Pioneer 2
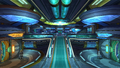
Hunter's Guild
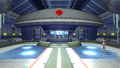
The Hunter's Guild is an area on Pioneer 2. When a new party is created, each player, including players that join after creation, spawns here. Quests may be initiated from the quest counter located within.
The Principal
The Principal is an area on Pioneer 2 that only appears in Episode 1 and 4. Government quests may be initiated from here by speaking with Momoka at her counter, but only if the current party is in multiplayer mode.
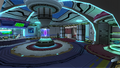
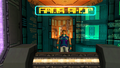
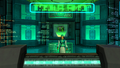
Lab
The Lab is an area on Pioneer 2 that only appears in Episode 2. Teleporters to each of the areas of episode 2 are found here.
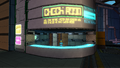
Check Room
The Check Room, more commonly known as the bank, is an area on Pioneer 2 that acts as a storage area for players' items. Up to 999,999,999 ![]() Meseta and 200 items can be stored.
Meseta and 200 items can be stored.
A check room that is shared across every character slot on the player's account can be accessed by using the chat command /bank, switching between the current character's check room and the shared check room with each use of the command.
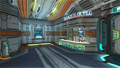
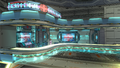
Shopping District
The Shopping District is an area in Pioneer 2 which houses the various shops, at which players can spend ![]() Meseta for Weapons, Frames and Barriers, and Tools. The Tekker is also located here.
Meseta for Weapons, Frames and Barriers, and Tools. The Tekker is also located here.
In Episode 1 and 4, the Check Room is located outside of the Shopping District. In Episode 2, the Check Room is located inside.
Arms shop
The Arms Shop allows the player to purchase common weapons. Stronger tiers of common weapons are made available both as a character's level increases, and are also affected by difficulty.
Weapons offered by the Arms Shop are randomized each time the player enters Pioneer 2. A player can purchase an unlimited amount of copies of any weapon available.
Weapons on offer can have up to second-tier specials (e.g. Heat or Fire, but never Flame or Burning), and can sometimes have one or two attributes, up to a maximum of 50% in each.
Notably, common sword-, partisan-, slicer-, handgun-, mechgun-, and shot-type weapons with the Charge special and 50% Hit may be available for purchase, and are some of the strongest options available to players.
Second-tier specials, including Charge, begin appearing in Ultimate at level 100+. The highest tier of common weapons (Gladius, Calibur, Ripper, Gungnir, Diska, Raygun, Laser, Vulcan, Arms, Club, Striker, and Scepter) are all available in Ultimate by level 151+.
The distribution of weapon types seen in the Arms Shop is partially affected by Section ID - somewhat like weapon item drops - as seen on the weapon drop tables page. For example, ![]() Purplenum is the most likely Section ID to see Mechguns,
Purplenum is the most likely Section ID to see Mechguns, ![]() Whitill is the most likely to see Slicers, and
Whitill is the most likely to see Slicers, and ![]() Viridia is the most likely to see Shots. Contrary to weapon item drops, the Arms Shop also follows a few rules regulating the amount of melee, ranged, and technique weapons available. There will always be several weapons available for each of these three categories.
Viridia is the most likely to see Shots. Contrary to weapon item drops, the Arms Shop also follows a few rules regulating the amount of melee, ranged, and technique weapons available. There will always be several weapons available for each of these three categories.
Tools shop
| Tool | Price |
|---|---|
Guard shop
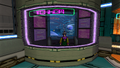
Tekker
- Main article: Tekking
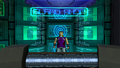
Medical Center
The Medical Center is a facility on Pioneer 2. It is staffed by nurse NPCs in distinctive nurse uniforms. Players can visit the Medical Center and pay ![]() 10 Meseta to be restored to perfect health. This heals all HP and TP, restores any missing
10 Meseta to be restored to perfect health. This heals all HP and TP, restores any missing ![]() traps for androids, and removes all status effects, including ATP Up and DFP Up.
traps for androids, and removes all status effects, including ATP Up and DFP Up.
If a player dies on Ragol and is not revived by any means, they will respawn at the Medical Center. In One Person mode, this is done automatically, while in multiplayer, a menu appears upon death, prompting the player to return to Pioneer 2. In older versions of Phantasy Star Online, players would lose all ![]() Meseta they were carrying when they respawned, however, Blue Burst does not impose any death costs on players.
Meseta they were carrying when they respawned, however, Blue Burst does not impose any death costs on players.
In Episode 1 and Episode 4, the Medical Center is located near the teleporter to Ragol's surface, just to the right when returning from Ragol. In Episode 2, the Medical Center is near the shops.
Gallery
Hunter's Guild (Episode 1 & 4)
Hunter's Guild (Episode 2)
The Principal
The Lab
Check room (Episodes 1 & 4)

Shopping District (Episode 1 & 4) (outside)

Shopping District (Episode 1 & 4) (inside)
Arms Shop NPC (Episode 1 & 4)
Tools Shop NPC (Episode 1 & 4)
Guard Shop NPC (Episode 1 & 4)
Tekker (Episode 1 & 4)
Medical Center (Episode 1 & 4)
Medical Center (Episode 2)
.png)
.png)


.png)
_01.png)
_02.png)
.png)
.png)
.png)
.png)
.png)
.png)
| Areas | ||
|---|---|---|
| Pioneer 2 | Check Room • Hunter's Guild • Lab • Medical Center • The Principal • Shopping District (Arms shop • Tools shop • Guard shop • Tekker) | |
| Episode 1 | Forest (1 • 2) • Cave (1 • 2 • 3) • Mine (1 • 2) • Ruins (1 • 2 • 3) • (Battle maps: Palace • Spaceship) | |
| Episode 2 | VR Temple (Alpha • Beta) • VR Spaceship (Alpha • Beta) • Central Control Area (Jungle (North) • Jungle (East) • Mountain • Seaside) • Seabed (Upper • Lower) • Control Tower | |
| Episode 4 | Crater (East • West • South • North • Interior) • Subterranean Desert (1 • 2 • 3) | |
| Bosses | Under the Dome (????) • Underground Channel • Monitor Room • ???? • VR Temple Final • VR Spaceship Final • Cliffs of Gal Da Val • Test Subject Disposal Area • Meteor Impact Site | |