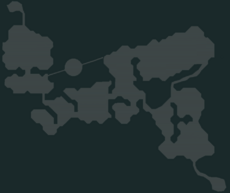
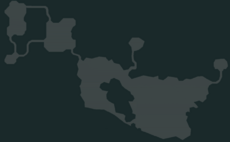
Central Control Area
| Central Control Area | ||||
|---|---|---|---|---|
Attributes
|
:
|
Native, A.Beast, Machine | ||
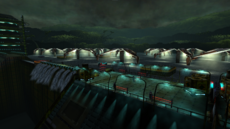
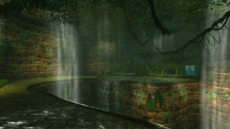
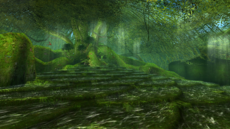
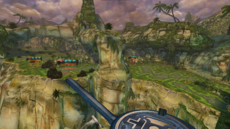
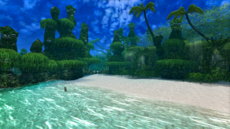
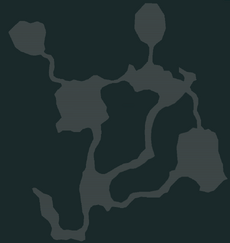
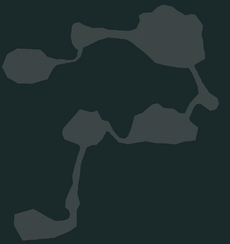
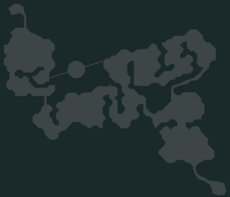
The Central Control Area (CCA) is the third area introduced in Episode 2. It is notable for being the first of only two areas of Episode 2 to deviate from the rectangular chamber-and-hallway map arrangements found in other Ep 1 & 2 areas, and combines the addition of the VR Temple's hidden paths with the VR Spaceship's elevation changes. As such, players can expect to traverse paths and rooms hidden behind vines, along tree roots, or around corners obscured by the game camera.
In free play mode, players are initially placed at the entrance to the abandoned CCA complex. The area's subsections, listed below, can be reached with the nearby red teleporter. In order to progress into the complex and reach the area's boss encounter, players must first activate the security switches scattered amongst these subsections.
Although they are only present as distant scenery, the CCA facility is home to multiple control tower areas that can be accessed during specific quests.
Map and layouts
Central Control Area
| Central Control Area Layouts | |
|---|---|
Though players will start in this section in free play mode, it is the last area that can be fully explored, and contains the teleporter that leads to the CCA's boss encounter. It is largely linear, but has two secret areas that can be accessed in some Episode 2 quests via green warp pads: a long balcony broken into sections by force field doors, and then a series of disconnected platforms floating atop the complex's water reservoir.
Jungle Area North
| Jungle Area North Layouts | |
|---|---|
Forest 1 is the first area accessible in Episode 1; owing to that fact, it is also the area many players first encounter on their initial playthrough of PSO. Appropriately, its difficulty is much lower than the later areas in the game - on a free adventure in the starting difficulty, Normal, it contains no enemies that use ranged attacks, inflict status effects, cast techniques, or even do enough damage to kill a full-health level 1 FOnewm, the most frail class, without landing a critical hit.
Jungle Area East
| Jungle Area East Layouts | |
|---|---|
Forest 1 is the first area accessible in Episode 1; owing to that fact, it is also the area many players first encounter on their initial playthrough of PSO. Appropriately, its difficulty is much lower than the later areas in the game - on a free adventure in the starting difficulty, Normal, it contains no enemies that use ranged attacks, inflict status effects, cast techniques, or even do enough damage to kill a full-health level 1 FOnewm, the most frail class, without landing a critical hit.
Mountain Area
| Mountain Area Layouts | |
|---|---|
Forest 1 is the first area accessible in Episode 1; owing to that fact, it is also the area many players first encounter on their initial playthrough of PSO. Appropriately, its difficulty is much lower than the later areas in the game - on a free adventure in the starting difficulty, Normal, it contains no enemies that use ranged attacks, inflict status effects, cast techniques, or even do enough damage to kill a full-health level 1 FOnewm, the most frail class, without landing a critical hit.
Seaside Area
| Seaside Area Layouts | |
|---|---|
Forest 1 is the first area accessible in Episode 1; owing to that fact, it is also the area many players first encounter on their initial playthrough of PSO. Appropriately, its difficulty is much lower than the later areas in the game - on a free adventure in the starting difficulty, Normal, it contains no enemies that use ranged attacks, inflict status effects, cast techniques, or even do enough damage to kill a full-health level 1 FOnewm, the most frail class, without landing a critical hit.
Monsters
| Name | Attribute | HP | ATP | DFP | MST | ATA | EVP | LCK | EFR | EIC | ETH | EDK | ELT | ESP | XP | DAR | Drop Type |
|---|---|---|---|---|---|---|---|---|---|---|---|---|---|---|---|---|---|
| Merillia | A.Beast | 190 | 213 | 65 | 0 | 93 | 85 | 8 | 10 | 45 | 30 | 15 | 30 | 5 | 14 | 30 | Weapon |
| Meriltas | A.Beast | 391 | 299 | 105 | 0 | 100 | 90 | 8 | 75 | 15 | 75 | 30 | 20 | 5 | 16 | 35 | Weapon |
| Gee | Native | 169 | 170 | 25 | 0 | 160 | 175 | 5 | 55 | 10 | 80 | 20 | 10 | 5 | 13 | 30 | Weapon |
| Ul Gibbon | Native | 275 | 265 | 37 | 56 | 130 | 219 | 8 | 75 | 25 | 10 | 10 | 20 | 5 | 15 | 30 | Weapon |
| Zol Gibbon | Native | 530 | 350 | 111 | 88 | 150 | 232 | 10 | 25 | 75 | 15 | 15 | 20 | 10 | 19 | 35 | Barrier |
| Sinow Berill | Machine | 424 | 321 | 97 | 67 | 142 | 222 | 10 | 60 | 25 | 60 | 38 | 50 | 15 | 24 | 40 | Weapon |
| Sinow Spigell | Machine | 555 | 420 | 144 | 92 | 139 | 250 | 0 | 39 | 70 | 56 | 42 | 75 | 20 | 27 | 45 | Frame |
| Gi Gue | Native | 1250 | 455 | 180 | 0 | 150 | 120 | 5 | 80 | 30 | 30 | 100 | 20 | 100 | 66 | 80 | Barrier |
| Gibbles | Native | 1980 | 767 | 97 | 0 | 135 | 120 | 10 | 50 | 15 | 85 | 100 | 10 | 100 | 67 | 80 | Unit |
| Mericarol | A.Beast | 1330 | 480 | 159 | 0 | 95 | 70 | 5 | 95 | 15 | 30 | 100 | 15 | 100 | 61 | 80 | Unit |
| Merikle | A.Beast | 1005 | 360 | 92 | 0 | 95 | 235 | 5 | 75 | 95 | 95 | 100 | 75 | 100 | 65 | 80 | Frame |
| Mericus | A.Beast | 1750 | 550 | 200 | 0 | 170 | 100 | 5 | 25 | 25 | 95 | 100 | 25 | 100 | 71 | 80 | Barrier |
| Gal Gryphon | A.Beast | 9000 | 500 | 100 | 0 | 250 | 120 | 5 | 79 | 65 | 85 | 1000 | 90 | 100 | 1950 | 100 | None |
| Name | Attribute | HP | ATP | DFP | MST | ATA | EVP | LCK | EFR | EIC | ETH | EDK | ELT | ESP | XP | DAR | Drop Type |
|---|---|---|---|---|---|---|---|---|---|---|---|---|---|---|---|---|---|
| Merillia | A.Beast | 170 | 193 | 45 | 0 | 93 | 85 | 8 | 0 | 45 | 30 | 15 | 30 | 5 | 14 | 30 | Weapon |
| Meriltas | A.Beast | 341 | 225 | 57 | 0 | 100 | 90 | 8 | 75 | 0 | 75 | 30 | 20 | 5 | 16 | 35 | Weapon |
| Gee | Native | 119 | 150 | 25 | 0 | 110 | 165 | 5 | 55 | 0 | 80 | 20 | 0 | 5 | 13 | 30 | Weapon |
| Ul Gibbon | Native | 225 | 192 | 37 | 56 | 90 | 189 | 8 | 75 | 25 | 0 | 10 | 20 | 5 | 15 | 30 | Weapon |
| Zol Gibbon | Native | 400 | 287 | 42 | 75 | 90 | 202 | 10 | 25 | 75 | 0 | 15 | 20 | 10 | 19 | 35 | Barrier |
| Sinow Berill | Machine | 354 | 293 | 78 | 67 | 115 | 202 | 10 | 60 | 30 | 60 | 28 | 0 | 17 | 24 | 40 | Weapon |
| Sinow Spigell | Machine | 475 | 360 | 100 | 92 | 130 | 225 | 0 | 15 | 50 | 50 | 28 | 50 | 39 | 27 | 45 | Frame |
| Gi Gue | Native | 880 | 389 | 150 | 0 | 100 | 120 | 5 | 80 | 30 | 30 | 100 | 10 | 75 | 66 | 80 | Barrier |
| Gibbles | Native | 1000 | 630 | 87 | 0 | 135 | 120 | 10 | 50 | 10 | 85 | 100 | 10 | 75 | 67 | 80 | Unit |
| Mericarol | A.Beast | 930 | 400 | 129 | 0 | 95 | 70 | 5 | 95 | 15 | 30 | 100 | 15 | 75 | 61 | 80 | Unit |
| Merikle | A.Beast | 799 | 320 | 82 | 0 | 95 | 215 | 5 | 75 | 95 | 95 | 100 | 75 | 75 | 65 | 80 | Frame |
| Mericus | A.Beast | 1110 | 480 | 175 | 0 | 95 | 100 | 5 | 25 | 25 | 95 | 100 | 25 | 75 | 71 | 80 | Barrier |
| Gal Gryphon | A.Beast | 7000 | 387 | 50 | 0 | 250 | 120 | 5 | 45 | 30 | 70 | 1000 | 70 | 100 | 1560 | 100 | None |
| Name | Attribute | HP | ATP | DFP | MST | ATA | EVP | LCK | EFR | EIC | ETH | EDK | ELT | ESP | XP | DAR | Drop Type |
|---|---|---|---|---|---|---|---|---|---|---|---|---|---|---|---|---|---|
| Merillia | A.Beast | 812 | 638 | 188 | 0 | 191 | 151 | 23 | 39 | 60 | 45 | 30 | 60 | 7 | 68 | 30 | Weapon |
| Meriltas | A.Beast | 1090 | 754 | 242 | 0 | 200 | 158 | 23 | 75 | 45 | 75 | 30 | 50 | 10 | 72 | 35 | Weapon |
| Gee | Native | 783 | 580 | 134 | 0 | 278 | 264 | 20 | 60 | 30 | 80 | 20 | 40 | 15 | 67 | 30 | Weapon |
| Ul Gibbon | Native | 930 | 708 | 150 | 112 | 239 | 319 | 23 | 75 | 60 | 39 | 40 | 50 | 20 | 71 | 30 | Weapon |
| Zol Gibbon | Native | 1281 | 823 | 250 | 176 | 265 | 335 | 25 | 50 | 75 | 39 | 50 | 39 | 20 | 78 | 35 | Barrier |
| Sinow Berill | Machine | 1846 | 715 | 288 | 0 | 184 | 133 | 25 | 60 | 42 | 70 | 50 | 63 | 35 | 85 | 40 | Weapon |
| Sinow Spigell | Machine | 1846 | 715 | 288 | 0 | 184 | 133 | 25 | 45 | 80 | 60 | 60 | 80 | 35 | 85 | 45 | Frame |
| Gi Gue | Native | 2275 | 964 | 343 | 0 | 265 | 195 | 20 | 80 | 45 | 70 | 65 | 50 | 100 | 154 | 80 | Barrier |
| Gibbles | Native | 3282 | 1385 | 231 | 0 | 246 | 195 | 25 | 60 | 45 | 85 | 100 | 60 | 100 | 157 | 80 | Unit |
| Mericarol | A.Beast | 2385 | 998 | 315 | 0 | 194 | 133 | 20 | 95 | 49 | 70 | 100 | 55 | 100 | 146 | 80 | Unit |
| Merikle | A.Beast | 1937 | 836 | 224 | 0 | 194 | 339 | 20 | 75 | 95 | 95 | 100 | 75 | 100 | 153 | 80 | Frame |
| Mericus | A.Beast | 2965 | 1093 | 370 | 0 | 291 | 170 | 20 | 60 | 60 | 95 | 100 | 43 | 100 | 163 | 80 | Barrier |
| Gal Gryphon | A.Beast | 13600 | 960 | 180 | 0 | 330 | 160 | 15 | 79 | 65 | 85 | 1000 | 90 | 100 | 5850 | 100 | None |
| Name | Attribute | HP | ATP | DFP | MST | ATA | EVP | LCK | EFR | EIC | ETH | EDK | ELT | ESP | XP | DAR | Drop Type |
|---|---|---|---|---|---|---|---|---|---|---|---|---|---|---|---|---|---|
| Merillia | A.Beast | 616 | 552 | 153 | 0 | 172 | 136 | 23 | 30 | 45 | 30 | 30 | 30 | 7 | 68 | 30 | Weapon |
| Meriltas | A.Beast | 844 | 590 | 168 | 0 | 180 | 143 | 23 | 75 | 30 | 75 | 30 | 30 | 10 | 72 | 35 | Weapon |
| Gee | Native | 548 | 500 | 127 | 0 | 191 | 236 | 20 | 60 | 15 | 80 | 20 | 15 | 15 | 67 | 30 | Weapon |
| Ul Gibbon | Native | 689 | 550 | 142 | 112 | 169 | 266 | 23 | 75 | 30 | 25 | 20 | 20 | 20 | 71 | 30 | Weapon |
| Zol Gibbon | Native | 922 | 664 | 149 | 150 | 169 | 283 | 25 | 30 | 75 | 25 | 25 | 20 | 20 | 78 | 35 | Barrier |
| Sinow Berill | Machine | 861 | 672 | 195 | 134 | 197 | 283 | 25 | 60 | 25 | 60 | 33 | 25 | 30 | 85 | 40 | Weapon |
| Sinow Spigell | Machine | 1022 | 752 | 223 | 184 | 213 | 311 | 15 | 30 | 60 | 60 | 33 | 60 | 35 | 91 | 45 | Frame |
| Gi Gue | Native | 1560 | 787 | 287 | 0 | 180 | 180 | 20 | 80 | 45 | 45 | 100 | 30 | 100 | 154 | 80 | Barrier |
| Gibbles | Native | 1720 | 1076 | 206 | 0 | 219 | 180 | 25 | 50 | 25 | 85 | 100 | 25 | 100 | 157 | 80 | Unit |
| Mericarol | A.Beast | 1627 | 800 | 260 | 0 | 175 | 118 | 20 | 95 | 25 | 30 | 100 | 25 | 100 | 146 | 80 | Unit |
| Merikle | A.Beast | 1453 | 704 | 200 | 0 | 175 | 299 | 20 | 75 | 95 | 95 | 100 | 75 | 100 | 153 | 80 | Frame |
| Mericus | A.Beast | 1866 | 896 | 319 | 0 | 175 | 155 | 20 | 30 | 30 | 95 | 100 | 30 | 100 | 163 | 80 | Barrier |
| Gal Gryphon | A.Beast | 9500 | 880 | 150 | 0 | 320 | 150 | 15 | 45 | 30 | 70 | 1000 | 70 | 100 | 3900 | 100 | None |
| Name | Attribute | HP | ATP | DFP | MST | ATA | EVP | LCK | EFR | EIC | ETH | EDK | ELT | ESP | XP | DAR | Drop Type |
|---|---|---|---|---|---|---|---|---|---|---|---|---|---|---|---|---|---|
| Merillia | A.Beast | 1226 | 1056 | 338 | 0 | 245 | 207 | 38 | 60 | 70 | 45 | 50 | 70 | 15 | 139 | 30 | Weapon |
| Meriltas | A.Beast | 1517 | 1170 | 398 | 0 | 254 | 214 | 38 | 90 | 60 | 90 | 50 | 60 | 20 | 144 | 35 | Weapon |
| Gee | Native | 1195 | 999 | 278 | 0 | 328 | 332 | 35 | 60 | 45 | 90 | 50 | 55 | 25 | 136 | 30 | Weapon |
| Ul Gibbon | Native | 1349 | 1125 | 296 | 224 | 291 | 392 | 38 | 80 | 60 | 45 | 60 | 60 | 30 | 141 | 30 | Weapon |
| Zol Gibbon | Native | 1719 | 1237 | 407 | 352 | 316 | 410 | 40 | 60 | 80 | 45 | 80 | 45 | 35 | 149 | 35 | Barrier |
| Sinow Berill | Machine | 1646 | 1287 | 362 | 0 | 285 | 380 | 50 | 70 | 50 | 80 | 69 | 72 | 40 | 149 | 40 | Weapon |
| Sinow Spigell | Machine | 2312 | 1131 | 449 | 0 | 239 | 187 | 40 | 55 | 90 | 70 | 77 | 90 | 50 | 159 | 45 | Frame |
| Gi Gue | Native | 2763 | 1376 | 510 | 0 | 316 | 256 | 35 | 80 | 50 | 80 | 100 | 65 | 100 | 243 | 80 | Barrier |
| Gibbles | Native | 3821 | 1787 | 386 | 0 | 297 | 256 | 40 | 79 | 55 | 90 | 100 | 70 | 100 | 245 | 80 | Unit |
| Mericarol | A.Beast | 2879 | 1409 | 479 | 0 | 248 | 187 | 35 | 95 | 60 | 80 | 100 | 60 | 100 | 232 | 80 | Unit |
| Merikle | A.Beast | 2407 | 1250 | 378 | 0 | 248 | 414 | 35 | 75 | 100 | 100 | 100 | 75 | 100 | 240 | 80 | Frame |
| Mericus | A.Beast | 3488 | 1501 | 540 | 0 | 341 | 228 | 35 | 75 | 75 | 95 | 100 | 55 | 100 | 253 | 80 | Barrier |
| Gal Gryphon | A.Beast | 20000 | 1490 | 360 | 0 | 280 | 200 | 5 | 79 | 65 | 85 | 1000 | 90 | 100 | 16250 | 100 | None |
| Name | Attribute | HP | ATP | DFP | MST | ATA | EVP | LCK | EFR | EIC | ETH | EDK | ELT | ESP | XP | DAR | Drop Type |
|---|---|---|---|---|---|---|---|---|---|---|---|---|---|---|---|---|---|
| Merillia | A.Beast | 988 | 891 | 290 | 0 | 232 | 188 | 38 | 45 | 60 | 30 | 30 | 45 | 15 | 139 | 30 | Weapon |
| Meriltas | A.Beast | 1227 | 931 | 308 | 0 | 240 | 195 | 38 | 80 | 45 | 80 | 30 | 30 | 20 | 144 | 35 | Weapon |
| Gee | Native | 917 | 838 | 259 | 0 | 252 | 294 | 35 | 60 | 30 | 80 | 30 | 15 | 25 | 136 | 30 | Weapon |
| Ul Gibbon | Native | 1065 | 890 | 277 | 168 | 229 | 326 | 38 | 75 | 45 | 30 | 25 | 30 | 30 | 141 | 30 | Weapon |
| Zol Gibbon | Native | 1310 | 1009 | 285 | 225 | 229 | 344 | 40 | 45 | 75 | 30 | 30 | 30 | 35 | 149 | 35 | Barrier |
| Sinow Berill | Machine | 1246 | 1016 | 341 | 201 | 257 | 344 | 40 | 60 | 30 | 70 | 35 | 30 | 45 | 159 | 40 | Weapon |
| Sinow Spigell | Machine | 1415 | 1100 | 375 | 276 | 275 | 374 | 30 | 30 | 75 | 60 | 35 | 75 | 50 | 165 | 45 | Frame |
| Gi Gue | Native | 1982 | 1136 | 453 | 0 | 240 | 235 | 35 | 80 | 45 | 60 | 100 | 55 | 100 | 243 | 80 | Barrier |
| Gibbles | Native | 2150 | 1438 | 355 | 0 | 280 | 235 | 40 | 60 | 30 | 85 | 100 | 30 | 100 | 245 | 80 | Unit |
| Mericarol | A.Beast | 2052 | 1150 | 420 | 0 | 234 | 168 | 35 | 95 | 25 | 30 | 100 | 25 | 100 | 232 | 80 | Unit |
| Merikle | A.Beast | 1869 | 1050 | 347 | 0 | 234 | 361 | 35 | 75 | 95 | 95 | 100 | 75 | 100 | 240 | 80 | Frame |
| Mericus | A.Beast | 2304 | 1250 | 491 | 0 | 234 | 208 | 35 | 50 | 50 | 95 | 100 | 30 | 100 | 253 | 80 | Barrier |
| Gal Gryphon | A.Beast | 11500 | 1300 | 270 | 0 | 250 | 180 | 5 | 45 | 30 | 70 | 1000 | 70 | 100 | 12870 | 100 | None |
| Name | Attribute | HP | ATP | DFP | MST | ATA | EVP | LCK | EFR | EIC | ETH | EDK | ELT | ESP | XP | DAR | Drop Type |
|---|---|---|---|---|---|---|---|---|---|---|---|---|---|---|---|---|---|
| Merillia | A.Beast | 2513 | 1889 | 666 | 0 | 293 | 538 | 58 | 75 | 90 | 50 | 45 | 75 | 15 | 436 | 30 | Weapon |
| Meriltas | A.Beast | 3056 | 2147 | 769 | 0 | 300 | 552 | 58 | 95 | 60 | 95 | 59 | 67 | 20 | 452 | 35 | Weapon |
| Gee | Native | 2456 | 1760 | 564 | 0 | 360 | 790 | 55 | 90 | 55 | 90 | 50 | 65 | 25 | 429 | 30 | Weapon |
| Ul Gibbon | Native | 2743 | 2045 | 595 | 1400 | 330 | 913 | 58 | 55 | 89 | 95 | 63 | 77 | 30 | 444 | 30 | Weapon |
| Zol Gibbon | Native | 3431 | 2300 | 784 | 2200 | 350 | 950 | 60 | 88 | 75 | 88 | 95 | 50 | 35 | 468 | 35 | Barrier |
| Sinow Berill | Machine | 3296 | 2414 | 707 | 0 | 325 | 888 | 70 | 81 | 50 | 88 | 80 | 72 | 40 | 468 | 40 | Weapon |
| Sinow Spigell | Machine | 4535 | 2060 | 856 | 0 | 288 | 496 | 60 | 69 | 95 | 77 | 80 | 95 | 50 | 499 | 45 | Frame |
| Gi Gue | Native | 5375 | 2615 | 961 | 0 | 350 | 636 | 55 | 80 | 60 | 80 | 105 | 75 | 100 | 748 | 80 | Barrier |
| Gibbles | Native | 7346 | 3551 | 748 | 0 | 335 | 636 | 60 | 90 | 69 | 88 | 105 | 80 | 100 | 756 | 80 | Unit |
| Mericarol | A.Beast | 3056 | 2147 | 769 | 0 | 300 | 552 | 58 | 95 | 55 | 80 | 105 | 79 | 20 | 717 | 80 | Unit |
| Merikle | A.Beast | 4714 | 2330 | 736 | 0 | 295 | 958 | 55 | 95 | 95 | 95 | 110 | 80 | 100 | 741 | 80 | Frame |
| Mericus | A.Beast | 6725 | 2900 | 1012 | 0 | 370 | 580 | 55 | 80 | 80 | 95 | 105 | 70 | 100 | 780 | 80 | Barrier |
| Gal Gryphon | A.Beast | 30000 | 2665 | 725 | 0 | 360 | 530 | 5 | 88 | 70 | 90 | 1000 | 95 | 100 | 32110 | 100 | None |
| Name | Attribute | HP | ATP | DFP | MST | ATA | EVP | LCK | EFR | EIC | ETH | EDK | ELT | ESP | XP | DAR | Drop Type |
|---|---|---|---|---|---|---|---|---|---|---|---|---|---|---|---|---|---|
| Merillia | A.Beast | 1925 | 1579 | 585 | 0 | 273 | 485 | 53 | 60 | 80 | 33 | 45 | 60 | 15 | 396 | 30 | Weapon |
| Meriltas | A.Beast | 2353 | 1675 | 615 | 0 | 280 | 498 | 53 | 89 | 60 | 89 | 59 | 42 | 20 | 409 | 35 | Weapon |
| Gee | Native | 1798 | 1450 | 536 | 0 | 290 | 681 | 50 | 60 | 30 | 80 | 50 | 30 | 25 | 390 | 30 | Weapon |
| Ul Gibbon | Native | 2063 | 1576 | 566 | 560 | 270 | 740 | 53 | 89 | 77 | 30 | 63 | 45 | 30 | 403 | 30 | Weapon |
| Zol Gibbon | Native | 2500 | 1861 | 578 | 700 | 270 | 772 | 55 | 45 | 75 | 80 | 75 | 45 | 35 | 422 | 35 | Barrier |
| Sinow Berill | Machine | 2385 | 1879 | 666 | 640 | 295 | 772 | 55 | 78 | 39 | 78 | 60 | 63 | 45 | 448 | 40 | Weapon |
| Sinow Spigell | Machine | 2688 | 2080 | 720 | 850 | 310 | 828 | 45 | 40 | 89 | 63 | 70 | 85 | 50 | 461 | 45 | Frame |
| Gi Gue | Native | 3700 | 2167 | 843 | 0 | 280 | 571 | 50 | 80 | 45 | 60 | 105 | 55 | 100 | 656 | 80 | Barrier |
| Gibbles | Native | 4000 | 2890 | 688 | 0 | 315 | 571 | 55 | 75 | 45 | 88 | 105 | 50 | 100 | 663 | 80 | Unit |
| Mericarol | A.Beast | 3825 | 2200 | 791 | 0 | 275 | 449 | 50 | 95 | 33 | 45 | 105 | 39 | 100 | 630 | 80 | Unit |
| Merikle | A.Beast | 3498 | 1960 | 676 | 0 | 275 | 804 | 50 | 75 | 95 | 95 | 110 | 75 | 100 | 650 | 80 | Frame |
| Mericus | A.Beast | 4275 | 2440 | 904 | 0 | 275 | 522 | 50 | 75 | 75 | 95 | 105 | 45 | 100 | 682 | 80 | Barrier |
| Gal Gryphon | A.Beast | 13600 | 2500 | 560 | 0 | 320 | 530 | 5 | 75 | 49 | 88 | 1000 | 81 | 100 | 23400 | 100 | None |
Rare drops
Box drops
| Jungle Area North | |||||||||
|---|---|---|---|---|---|---|---|---|---|
| Cannon | Blaster | Breaker | Glaive | Repeater | Staff | Cutter | Blade | AddSlot | Cutter |
| 1/1820.44 | 1/1820.44 | 1/1820.44 | 1/1820.44 | 1/1820.44 | 1/1820.44 | 1/1820.44 | 1/1820.44 | 1/1170.29 | 1/1820.44 |
| Glaive | Blade | Blaster | Pole | Blade | Glaive | Cannon | Breaker | Red Barrier | Repeater |
| 1/1820.44 | 1/1820.44 | 1/1820.44 | 1/1820.44 | 1/1820.44 | 1/1820.44 | 1/1820.44 | 1/1820.44 | 1/1170.29 | 1/1820.44 |
| Red Barrier | Red Barrier | Amplifier of Gizonde | AddSlot | Amplifier of Gizonde | Red Barrier | Amplifier of Gizonde | Red Barrier | ||
| 1/1170.29 | 1/1170.29 | 1/1170.29 | 1/1170.29 | 1/1170.29 | 1/1170.29 | 1/1170.29 | 1/1170.29 | ||
| Red Barrier | Amplifier of Gizonde | Red Barrier | Red Barrier | ||||||
| 1/1170.29 | 1/1170.29 | 1/1170.29 | 1/1170.29 | ||||||
| Jungle Area East | |||||||||
| Mag | Mag | Mag | Mag | Mag | Mag | Mag | Mag | Mag | Mag |
| 1/113.78 | 1/113.78 | 1/113.78 | 1/113.78 | 1/113.78 | 1/113.78 | 1/113.78 | 1/113.78 | 1/113.78 | 1/113.78 |
| Amplifier of Gifoie | Amplifier of Gifoie | Amplifier of Gifoie | Yellow Barrier | Amplifier of Gifoie | Yellow Barrier | AddSlot | Yellow Barrier | AddSlot | |
| 1/1170.29 | 1/1170.29 | 1/1170.29 | 1/1170.29 | 1/1170.29 | 1/1170.29 | 1/1170.29 | 1/1170.29 | 1/1170.29 | |
| Yellow Barrier | Yellow Barrier | Amplifier of Gifoie | Amplifier of Gifoie | ||||||
| 1/1170.29 | 1/1170.29 | 1/1170.29 | 1/1170.29 | ||||||
| Yellow Barrier | |||||||||
| 1/1170.29 | |||||||||
| Mountain Area | |||||||||
|---|---|---|---|---|---|---|---|---|---|
| Mag | Mag | Mag | Mag | Mag | Mag | Mag | Mag | Mag | Mag |
| 1/256 | 1/256 | 1/256 | 1/256 | 1/256 | 1/256 | 1/256 | 1/256 | 1/256 | 1/256 |
| Cannon | Blaster | Breaker | Glaive | Repeater | Staff | Cutter | Blade | AddSlot | Cutter |
| 1/1489.45 | 1/1489.45 | 1/1489.45 | 1/1489.45 | 1/1489.45 | 1/1489.45 | 1/1489.45 | 1/1489.45 | 1/1170.29 | 1/1489.45 |
| Glaive | Blade | Blaster | Pole | Blade | Glaive | Cannon | Breaker | Repeater | |
| 1/1489.45 | 1/1489.45 | 1/1489.45 | 1/1489.45 | 1/1489.45 | 1/1489.45 | 1/1489.45 | 1/1489.45 | 1/1489.45 | |
| Amplifier of Razonde | Amplifier of Razonde | Amplifier of Razonde | AddSlot | Amplifier of Razonde | |||||
| 1/1170.29 | 1/1170.29 | 1/1170.29 | 1/1170.29 | 1/1170.29 | |||||
| Seaside Area & Central Control Area | |||||||||
|---|---|---|---|---|---|---|---|---|---|
| Amplifier of Rabarta | Amplifier of Rabarta | Amplifier of Rabarta | AddSlot | Amplifier of Blue | AddSlot | Amplifier of Rabarta | |||
| 1/1170.29 | 1/1170.29 | 1/1170.29 | 1/1170.29 | 1/1170.29 | 1/1170.29 | 1/1170.29 | |||
| Blue Barrier | Amplifier of Blue | Blue Barrier | Amplifier of Rabarta | Blue Barrier | Amplifier of Blue | Blue Barrier | |||
| 1/1170.29 | 1/1170.29 | 1/1170.29 | 1/1170.29 | 1/1170.29 | 1/1170.29 | 1/1170.29 | |||
| Blue Barrier | Amplifier of Blue | Blue Barrier | |||||||
| 1/1170.29 | 1/1170.29 | 1/1170.29 | |||||||
| Blue Barrier | |||||||||
| 1/1170.29 | |||||||||
| Jungle Area North | |||||||||
|---|---|---|---|---|---|---|---|---|---|
| Arms | Laser | Calibur | Gungnir | Vulcan | Scepter | Diska | Ripper | Red Barrier | Diska |
| 1/455.11 | 1/455.11 | 1/455.11 | 1/455.11 | 1/455.11 | 1/455.11 | 1/455.11 | 1/455.11 | 1/1170.29 | 1/455.11 |
| Gungnir | Ripper | Laser | Pillar | Ripper | Gungnir | Arms | Calibur | Vulcan | |
| 1/455.11 | 1/455.11 | 1/455.11 | 1/455.11 | 1/455.11 | 1/455.11 | 1/455.11 | 1/455.11 | 1/455.11 | |
| Red Barrier | Red Barrier | AddSlot | Amplifier of Gizonde | Amplifier of Gizonde | Red Barrier | Red Barrier | Red Barrier | ||
| 1/1170.29 | 1/1170.29 | 1/1170.29 | 1/1170.29 | 1/1170.29 | 1/1170.29 | 1/1170.29 | 1/1170.29 | ||
| Amplifier of Gizonde | Red Barrier | AddSlot | Amplifier of Gizonde | ||||||
| 1/1170.29 | 1/1170.29 | 1/1170.29 | 1/1170.29 | ||||||
| Red Barrier | Amplifier of Gizonde | Red Barrier | |||||||
| 1/1170.29 | 1/1170.29 | 1/1170.29 | |||||||
| Red Barrier | |||||||||
| 1/1170.29 | |||||||||
| Jungle Area East | |||||||||
| Mag | Mag | Mag | Mag | Mag | Mag | Mag | Mag | Mag | Mag |
| 1/113.78 | 1/113.78 | 1/113.78 | 1/113.78 | 1/113.78 | 1/113.78 | 1/113.78 | 1/113.78 | 1/113.78 | 1/113.78 |
| Amplifier of Gifoie | AddSlot | Amplifier of Gifoie | Yellow Barrier | Amplifier of Gifoie | Yellow Barrier | Yellow Barrier | AddSlot | Amplifier of Gifoie | |
| 1/1170.29 | 1/1170.29 | 1/1170.29 | 1/1170.29 | 1/1170.29 | 1/1170.29 | 1/1170.29 | 1/1170.29 | 1/1170.29 | |
| Amplifier of Gifoie | Yellow Barrier | Yellow Barrier | Amplifier of Gifoie | Amplifier of Gifoie | Yellow Barrier | ||||
| 1/1170.29 | 1/1170.29 | 1/1170.29 | 1/1170.29 | 1/1170.29 | 1/1170.29 | ||||
| Yellow Barrier | Yellow Barrier | ||||||||
| 1/1170.29 | 1/1170.29 | ||||||||
| Mountain Area | |||||||||
|---|---|---|---|---|---|---|---|---|---|
| Mag | Mag | Mag | Mag | Mag | Mag | Mag | Mag | Mag | Mag |
| 1/146.29 | 1/256 | 1/256 | 1/256 | 1/256 | 1/256 | 1/256 | 1/256 | 1/256 | 1/256 |
| Arms | Laser | Calibur | Gungnir | Vulcan | Scepter | Diska | Ripper | Diska | |
| 1/372.36 | 1/372.36 | 1/372.36 | 1/372.36 | 1/372.36 | 1/372.36 | 1/372.36 | 1/372.36 | 1/372.36 | |
| Gungnir | Ripper | Laser | Pillar | Ripper | Gungnir | Arms | Calibur | Vulcan | |
| 1/372.36 | 1/372.36 | 1/372.36 | 1/372.36 | 1/372.36 | 1/372.36 | 1/372.36 | 1/372.36 | 1/372.36 | |
| AddSlot | Amplifier of Razonde | Amplifier of Razonde | Amplifier of Razonde | AddSlot | Amplifier of Razonde | ||||
| 1/1170.29 | 1/1170.29 | 1/1170.29 | 1/1170.29 | 1/1170.29 | 1/1170.29 | ||||
| Amplifier of Razonde | |||||||||
| 1/1170.29 | |||||||||
| Seaside Area & Central Control Area | |||||||||
|---|---|---|---|---|---|---|---|---|---|
| Amplifier of Rabarta | Amplifier of Rabarta | Amplifier of Rabarta | Amplifier of Rabarta | Amplifier of Blue | Amplifier of Blue | AddSlot | Amplifier of Rabarta | ||
| 1/1170.29 | 1/1170.29 | 1/1170.29 | 1/1170.29 | 1/1170.29 | 1/1170.29 | 1/1170.29 | 1/1170.29 | ||
| Blue Barrier | Amplifier of Blue | Blue Barrier | Amplifier of Blue | Blue Barrier | Blue Barrier | Amplifier of Blue | Blue Barrier | ||
| 1/1170.29 | 1/1170.29 | 1/1170.29 | 1/1170.29 | 1/1170.29 | 1/1170.29 | 1/1170.29 | 1/1170.29 | ||
| Blue Barrier | Blue Barrier | Blue Barrier | |||||||
| 1/1170.29 | 1/1170.29 | 1/1170.29 | |||||||
| Jungle Area North | |||||||||
|---|---|---|---|---|---|---|---|---|---|
| Crush Bullet | Visk-235W | Flowen's Sword | Brionac | M&A60 Vise | Fire Scepter: Agni | Diska | Blade Dance | DB's Saber | Slicer of Assassin |
| 1/455.11 | 1/455.11 | 1/455.11 | 1/455.11 | 1/455.11 | 1/455.11 | 1/455.11 | 1/455.11 | 1/455.11 | 1/455.11 |
| Gungnir | Ripper | Laser | Striker | Ripper | Gungnir | Arms | Calibur | Varista | Vulcan |
| 1/455.11 | 1/455.11 | 1/455.11 | 1/455.11 | 1/455.11 | 1/455.11 | 1/455.11 | 1/455.11 | 1/455.11 | 1/455.11 |
| DB's Saber | DB's Saber | DB's Saber | DB's Saber | DB's Saber | Club of Laconium | DB's Saber | DB's Saber | Club of Laconium | DB's Saber |
| 1/455.11 | 1/455.11 | 1/455.11 | 1/455.11 | 1/455.11 | 1/455.11 | 1/455.11 | 1/455.11 | 1/455.11 | 1/455.11 |
| Varista | Varista | Varista | Varista | Varista | Varista | Varista | Varista | Red Barrier | Varista |
| 1/455.11 | 1/455.11 | 1/455.11 | 1/455.11 | 1/455.11 | 1/455.11 | 1/455.11 | 1/455.11 | 1/1170.29 | 1/455.11 |
| Club of Laconium | Club of Laconium | Club of Laconium | Club of Laconium | Club of Laconium | DB's Saber | Club of Laconium | Club of Laconium | Club of Laconium | |
| 1/455.11 | 1/455.11 | 1/455.11 | 1/455.11 | 1/455.11 | 1/455.11 | 1/455.11 | 1/455.11 | 1/455.11 | |
| Red Barrier | AddSlot | Red Barrier | Amplifier of Gizonde | Red Barrier | AddSlot | ||||
| 1/1170.29 | 1/1170.29 | 1/1170.29 | 1/1170.29 | 1/1170.29 | 1/1170.29 | ||||
| AddSlot | AddSlot | AddSlot | |||||||
| 1/1170.29 | 1/1170.29 | 1/1170.29 | |||||||
| Jungle Area East | |||||||||
| Mag | Mag | Mag | Mag | Mag | Mag | Mag | Mag | Mag | Mag |
| 1/146.29 | 1/146.29 | 1/146.29 | 1/146.29 | 1/146.29 | 1/146.29 | 1/146.29 | 1/146.29 | 1/146.29 | 1/146.29 |
| Amplifier of Gifoie | Amplifier of Gifoie | Yellow Barrier | AddSlot | Yellow Barrier | Yellow Barrier | Yellow Barrier | |||
| 1/1170.29 | 1/1170.29 | 1/1170.29 | 1/1170.29 | 1/1170.29 | 1/1170.29 | 1/1170.29 | |||
| AddSlot | AddSlot | M&A60 Vise | |||||||
| 1/1170.29 | 1/1170.29 | 1/315.08 | |||||||
| AddSlot | |||||||||
| 1/1170.29 | |||||||||
| Seaside Area & Central Control Area | |||||||||
|---|---|---|---|---|---|---|---|---|---|
| AddSlot | Blue Barrier | Blue Barrier | Amplifier of Rabarta | AddSlot | Visk-235W | Amplifier of Rabarta | |||
| 1/1170.29 | 1/1170.29 | 1/1170.29 | 1/1170.29 | 1/1170.29 | 1/315.08 | 1/1170.29 | |||
| AddSlot | AddSlot | Blue Barrier | Blue Barrier | ||||||
| 1/1170.29 | 1/1170.29 | 1/1170.29 | whi2 | ||||||
| Jungle Area North | |||||||||
|---|---|---|---|---|---|---|---|---|---|
| Final Impact | Justy-23ST | Dragon Slayer | Gae Bolg | L&K14 Combat | Storm Wand: Indra | Diska of Braveman | Cross Scar | Durandal | Diska of Braveman |
| 1/630.15 | 1/630.15 | 1/630.15 | 1/630.15 | 1/630.15 | 1/630.15 | 1/630.15 | 1/630.15 | 1/1024 | 1/630.15 |
| Vjaya | Bloody Art | Wals-MK2 | Brave Hammer | Bloody Art | Vjaya | Durandal | Last Survivor | Bravace | H&S25 Justice |
| 1/585.14 | 1/585.14 | 1/585.14 | 1/585.14 | 1/585.14 | 1/585.14 | 1/585.14 | 1/585.14 | 1/1024 | 1/585.14 |
| Bravace | Durandal | Durandal | Durandal | Durandal | Amplifier of Gizonde | Durandal | Durandal | Club of Zumiuran | Durandal |
| 1/585.14 | 1/585.14 | 1/585.14 | 1/585.14 | 1/585.14 | 1/630.15 | 1/585.14 | 1/585.14 | 1/1024 | 1/585.14 |
| Bravace | Bravace | Bravace | Bravace | Red Barrier | Club of Zumiuran | Bravace | AddSlot | Bravace | |
| 1/585.14 | 1/585.14 | 1/585.14 | 1/585.14 | 1/630.15 | 1/585.14 | 1/585.14 | 1/1170.29 | 1/585.14 | |
| Club of Zumiuran | Club of Zumiuran | Club of Zumiuran | Club of Zumiuran | Red Barrier | Club of Zumiuran | Red Barrier | Club of Zumiuran | ||
| 1/585.14 | 1/585.14 | 1/585.14 | 1/585.14 | 1/1170.29 | 1/585.14 | 1/1170.29 | 1/1170.29 | ||
| Red Barrier | Red Barrier | ||||||||
| 1/1170.29 | 1/1170.29 | ||||||||
| Jungle Area East | |||||||||
| Mag | Mag | Mag | Mag | Mag | Mag | Mag | Mag | Mag | Mag |
| 1/146.29 | 1/146.29 | 1/146.29 | 1/146.29 | 1/146.29 | 1/146.29 | 1/146.29 | 1/146.29 | 1/146.29 | 1/146.29 |
| Final Impact | Justy-23ST | Dragon Slayer | Gae Bolg | L&K14 Combat | Storm Wand: Indra | Diska of Braveman | Cross Scar | Yellow Barrier | Diska of Braveman |
| 1/585.14 | 1/585.14 | 1/585.14 | 1/585.14 | 1/585.14 | 1/585.14 | 1/585.14 | 1/585.14 | 1/1170.29 | 1/585.14 |
| Durandal | Yellow Barrier | Yellow Barrier | Amplifier of Gifoie | Yellow Barrier | Yellow Barrier | ||||
| 1/455.11 | 1/1170.29 | 1/1170.29 | 1/630.15 | 1/1170.29 | 1/1170.29 | ||||
| AddSlot | Yellow Barrier | ||||||||
| 1/1170.29 | 1/630.15 | ||||||||
| Mountain Area | |||||||||
|---|---|---|---|---|---|---|---|---|---|
| Final Impact | Justy-23ST | Dragon Slayer | Gae Bolg | L&K14 Combat | Storm Wand: Indra | Diska of Braveman | Cross Scar | Durandal | Diska of Braveman |
| 1/455.11 | 1/455.11 | 1/455.11 | 1/455.11 | 1/455.11 | 1/455.11 | 1/455.11 | 1/455.11 | 1/819.20 | 1/455.11 |
| Vjaya | Bloody Art | Wals-MK2 | Brave Hammer | Bloody Art | Vjaya | Durandal | Last Survivor | Bravace | H&S25 Justice |
| 1/455.11 | 1/455.11 | 1/455.11 | 1/455.11 | 1/455.11 | 1/455.11 | 1/455.11 | 1/455.11 | 1/819.20 | 1/455.11 |
| Bravace | Durandal | Durandal | Durandal | Durandal | Amplifier of Razonde | Bravace | Durandal | Club of Zumiuran | Durandal |
| 1/455.11 | 1/455.11 | 1/455.11 | 1/455.11 | 1/455.11 | 1/630.15 | 1/455.11 | 1/455.11 | 1/819.20 | 1/455.11 |
| Bravace | Bravace | Bravace | Bravace | Club of Zumiuran | Bravace | Bravace | |||
| 1/455.11 | 1/455.11 | 1/455.11 | 1/455.11 | 1/455.11 | 1/455.11 | 1/455.11 | |||
| Club of Zumiuran | Club of Zumiuran | Club of Zumiuran | Club of Zumiuran | Club of Zumiuran | Club of Zumiuran | ||||
| 1/455.11 | 1/455.11 | 1/455.11 | 1/455.11 | 1/455.11 | 1/455.11 | ||||
| AddSlot | |||||||||
| 1/1170.29 | |||||||||
| Seaside Area & Central Control Area | |||||||||
|---|---|---|---|---|---|---|---|---|---|
| Final Impact | Justy-23ST | Dragon Slayer | Gae Bolg | L&K14 Combat | Storm Wand: Indra | Diska of Braveman | Cross Scar | Amplifier of Blue | Diska of Braveman |
| 1/372.36 | 1/372.36 | 1/372.36 | 1/372.36 | 1/372.36 | 1/372.36 | 1/372.36 | 1/372.36 | 1/1170.29 | 1/372.36 |
| Club of Zumiuran | Amplifier of Blue | AddSlot | Amplifier of Rabarta | Amplifier of Blue | Blue Barrier | ||||
| 1/585.14 | 1/1170.29 | 1/1170.29 | 1/630.15 | 1/1170.29 | 1/1170.29 | ||||
| Blue Barrier | Blue Barrier | Amplifier of Blue | Blue Barrier | ||||||
| 1/1170.29 | 1/1170.29 | 1/630.15 | 1/1170.29 | ||||||
| Blue Barrier | |||||||||
| 1/630.15 | |||||||||
| Areas | ||
|---|---|---|
| Pioneer 2 | Check Room • Hunter's Guild • Lab • Medical Center • The Principal • Shopping District (Arms Shop • Tools Shop • Guards Shop • Tekker) | |
| Episode 1 | Forest (1 • 2) • Cave (1 • 2 • 3) • Mine (1 • 2) • Ruins (1 • 2 • 3) • (Battle maps: Palace • Spaceship) | |
| Episode 2 | VR Temple (Alpha • Beta) • VR Spaceship (Alpha • Beta) • Central Control Area (Jungle (North) • Jungle (East) • Mountain • Seaside) • Seabed (Upper • Lower) • Control Tower | |
| Episode 4 | Crater (East • West • South • North • Interior) • Subterranean Desert (1 • 2 • 3) | |
| Bosses | Under the Dome (????) • Underground Channel • Monitor Room • ???? • VR Temple Final • VR Spaceship Final • Cliffs of Gal Da Val • Test Subject Disposal Area • Meteor Impact Site | |
