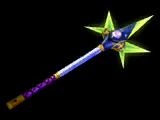
Mace of Adaman: Difference between revisions
From Ephinea PSO Wiki
No edit summary |
|||
| Line 21: | Line 21: | ||
|vangle = 26 | |vangle = 26 | ||
|hex = 000A05 | |hex = 000A05 | ||
|desc = Legendary cane of Adaman, when equipped, boosts Barta.<br>Its special attack freezes enemies. | |||
}} | }} | ||
{{Cane|rare|Mace of Adaman}} is a rare [[Canes|cane]]. It is one of the three elemental canes that offer the highest individual boosts to [[Techniques#Simple techniques|simple technqiues]]. | |||
==Technique Boost== | ==Technique Boost== | ||
{{TechBoostTable}} | {{TechBoostTable}} | ||
| Line 61: | Line 60: | ||
{{DropRow|Ruins 3|1/315}} | {{DropRow|Ruins 3|1/315}} | ||
{{DropRow|Mountain|1/372}} | {{DropRow|Mountain|1/372}} | ||
{{DropRow|Seabed Lower | {{DropRow|nolink=1|[[Seabed Lower]], [[Control Tower]]|1/315}} | ||
{{DropRow|diff=Ultimate|diffspan=2|Forest 2|1/630}} | {{DropRow|diff=Ultimate|diffspan=2|Forest 2|1/630}} | ||
{{DropRow|VR Spaceship Alpha|1/630}} | {{DropRow|VR Spaceship Alpha|1/630}} | ||
| Line 67: | Line 66: | ||
{{DropRow|Ruins 3|1/315}} | {{DropRow|Ruins 3|1/315}} | ||
{{DropRow|Mountain|1/372}} | {{DropRow|Mountain|1/372}} | ||
{{DropRow|Seabed Lower | {{DropRow|nolink=1|[[Seabed Lower]], [[Control Tower]]|1/315}} | ||
{{DropRow|diff=Ultimate|diffspan=2|Forest 2|1/630}} | {{DropRow|diff=Ultimate|diffspan=2|Forest 2|1/630}} | ||
{{DropRow|VR Temple Beta|1/630}} | {{DropRow|VR Temple Beta|1/630}} | ||
| Line 73: | Line 72: | ||
{{DropRow|Ruins 3|1/315}} | {{DropRow|Ruins 3|1/315}} | ||
{{DropRow|Mountain|1/372}} | {{DropRow|Mountain|1/372}} | ||
{{DropRow|Seabed Lower | {{DropRow|nolink=1|[[Seabed Lower]], [[Control Tower]]|1/315}} | ||
{{DropRow|diff=Ultimate|diffspan=2|Forest 2|1/630}} | {{DropRow|diff=Ultimate|diffspan=2|Forest 2|1/630}} | ||
{{DropRow|VR Temple Beta|1/630}} | {{DropRow|VR Temple Beta|1/630}} | ||
| Line 79: | Line 78: | ||
{{DropRow|Ruins 3|1/315}} | {{DropRow|Ruins 3|1/315}} | ||
{{DropRow|Mountain|1/372}} | {{DropRow|Mountain|1/372}} | ||
{{DropRow|Seabed Lower | {{DropRow|nolink=1|[[Seabed Lower]], [[Control Tower]]|1/315}} | ||
{{DropRow|diff=Ultimate|diffspan=2|Forest 2|1/630}} | {{DropRow|diff=Ultimate|diffspan=2|Forest 2|1/630}} | ||
{{DropRow|VR Temple Beta|1/630}} | {{DropRow|VR Temple Beta|1/630}} | ||
| Line 85: | Line 84: | ||
{{DropRow|Ruins 3|1/315}} | {{DropRow|Ruins 3|1/315}} | ||
{{DropRow|Mountain|1/372}} | {{DropRow|Mountain|1/372}} | ||
{{DropRow|Seabed Lower | {{DropRow|nolink=1|[[Seabed Lower]], [[Control Tower]]|1/315}} | ||
{{DropRow|diff=Ultimate|diffspan=2|Forest 2|1/630}} | {{DropRow|diff=Ultimate|diffspan=2|Forest 2|1/630}} | ||
{{DropRow|VR Temple Beta|1/630}} | {{DropRow|VR Temple Beta|1/630}} | ||
| Line 91: | Line 90: | ||
{{DropRow|Ruins 3|1/315}} | {{DropRow|Ruins 3|1/315}} | ||
{{DropRow|Mountain|1/372}} | {{DropRow|Mountain|1/372}} | ||
{{DropRow|Seabed Lower | {{DropRow|nolink=1|[[Seabed Lower]], [[Control Tower]]|1/315}} | ||
{{DropRow|id=Redria|idspan=6|diff=Very Hard|diffspan=4|Mine 2|1/372}} | {{DropRow|id=Redria|idspan=6|diff=Very Hard|diffspan=4|Mine 2|1/372}} | ||
{{DropRow|Ruins 3|1/315}} | {{DropRow|Ruins 3|1/315}} | ||
{{DropRow|Mountain|1/372}} | {{DropRow|Mountain|1/372}} | ||
{{DropRow|Seabed Lower | {{DropRow|nolink=1|[[Seabed Lower]], [[Control Tower]]|1/315}} | ||
{{DropRow|diff=Ultimate|diffspan=2|Forest 2|1/630}} | {{DropRow|diff=Ultimate|diffspan=2|Forest 2|1/630}} | ||
{{DropRow|VR Temple Beta|1/630}} | {{DropRow|VR Temple Beta|1/630}} | ||
| Line 101: | Line 100: | ||
{{DropRow|Ruins 3|1/315}} | {{DropRow|Ruins 3|1/315}} | ||
{{DropRow|Mountain|1/372}} | {{DropRow|Mountain|1/372}} | ||
{{DropRow|Seabed Lower | {{DropRow|nolink=1|[[Seabed Lower]], [[Control Tower]]|1/315}} | ||
{{DropRow|diff=Ultimate|diffspan=2|Forest 2|1/630}} | {{DropRow|diff=Ultimate|diffspan=2|Forest 2|1/630}} | ||
{{DropRow|VR Temple Beta|1/630}} | {{DropRow|VR Temple Beta|1/630}} | ||
| Line 107: | Line 106: | ||
{{DropRow|Ruins 3|1/315}} | {{DropRow|Ruins 3|1/315}} | ||
{{DropRow|Mountain|1/372}} | {{DropRow|Mountain|1/372}} | ||
{{DropRow|Seabed Lower | {{DropRow|nolink=1|[[Seabed Lower]], [[Control Tower]]|1/315}} | ||
{{DropRow|diff=Ultimate|diffspan=2|Forest 2|1/585}} | {{DropRow|diff=Ultimate|diffspan=2|Forest 2|1/585}} | ||
{{DropRow|VR Temple Beta|1/1170}} | {{DropRow|VR Temple Beta|1/1170}} | ||
| Line 113: | Line 112: | ||
{{DropRow|Ruins 3|1/315}} | {{DropRow|Ruins 3|1/315}} | ||
{{DropRow|Mountain|1/372}} | {{DropRow|Mountain|1/372}} | ||
{{DropRow|Seabed Lower | {{DropRow|nolink=1|[[Seabed Lower]], [[Control Tower]]|1/315}} | ||
{{DropRow|diff=Ultimate|diffspan=2|Forest 2|1/630}} | {{DropRow|diff=Ultimate|diffspan=2|Forest 2|1/630}} | ||
{{DropRow|VR Temple Beta|1/630}} | {{DropRow|VR Temple Beta|1/630}} | ||
Latest revision as of 16:35, 14 September 2024
| ||||||||||||||||||||||||||||||||||||||||||||||||||||||
![]() Mace of Adaman is a rare cane. It is one of the three elemental canes that offer the highest individual boosts to simple technqiues.
Mace of Adaman is a rare cane. It is one of the three elemental canes that offer the highest individual boosts to simple technqiues.
Technique Boost
| Technique | Boost |
|---|---|
| +40% Damage |
Availability
Enemy Drops
| Section ID | Difficulty | Enemy | Drop Rate |
|---|---|---|---|
| Hard | Boota | 1/457 | |
| Ze Boota | 1/457 | ||
| Very Hard | Dark Belra (E1) | 1/142 | |
| Hard | Barbarous Wolf (E1) | 1/284 | |
| Migium (E1) | 1/91.4 | ||
| Sinow Beat | 1/256 | ||
| La Dimenian (E1) | 1/413 | ||
| Rag Rappy (E2) | 1/128 | ||
| Savage Wolf (E2) | 1/427 | ||
| Sinow Berill | 1/320 | ||
| Dolmolm | 1/427 | ||
| Boota | 1/457 | ||
| Very Hard | Pofuilly Slime | 1/237 | |
| Dark Belra (E1) | 1/142 | ||
| Satellite Lizard | 1/427 | ||
| Hard | Boota | 1/457 | |
| Hard | Al Rappy (Rare) | 7/8 | |
| Pouilly Slime (Rare) | 7/8 | ||
| Nar Lily (E2) (Rare) | 7/8 | ||
| Epsilon | 1/213 | ||
| Very Hard | Ul Gibbon | 1/427 |
Box Drops
Black Paper's Dangerous Deal
- Main article:
 Black Paper's Dangerous Deal
Note that all rates are the chance of getting an item per Photon Crystal, not per roll.
| Quest | Difficulty | Rate |
|---|---|---|
| Rappy Route | Ultimate | 1/6.14 |
Wandering Tekker
- Main article: Coren
| Day | Meseta | Rate |
|---|---|---|
| Tuesday | 10,000 | 1/662.5 |
| 100,000 | 1/441.67 | |
| Thursday | 10,000 | 1/856.25 |
| 100,000 | 1/570.83 |
| Canes | |
|---|---|
| Common | Cane • Stick • Mace • Club |
| 9★ | Club of Laconium • Club of Zumiuran • Flower Cane • Lollipop • Mace of Adaman |
| 10★ | Clio • Windmill |
| 11★ | Decalog • Summit Moon |
| Other | ES Cane • ES Moon • ES Windmill |
