Item box: Difference between revisions
(→Item box drop tables: updated area names; ultimate cave 2 and 1 were swapped and I undid that but someone might want to double-check that it wasn't the entire rows that got swapped? ie verify data is right) |
|||
| Line 22: | Line 22: | ||
{{ItemBoxDropRow | Forest 1 | 7% | 2% | 2% | 0% | 17% | 50% | 22% | 3 | 10 | 62% | 10% | 15 }} | {{ItemBoxDropRow | Forest 1 | 7% | 2% | 2% | 0% | 17% | 50% | 22% | 3 | 10 | 62% | 10% | 15 }} | ||
{{ItemBoxDropRow | Forest 2 | 7% | 2% | 2% | 0% | 17% | 50% | 22% | 5 | 15 | 62% | 10% | 25 }} | {{ItemBoxDropRow | Forest 2 | 7% | 2% | 2% | 0% | 17% | 50% | 22% | 5 | 15 | 62% | 10% | 25 }} | ||
{{ItemBoxDropRow | | {{ItemBoxDropRow | Cave 1 | 8% | 2% | 2% | 3% | 18% | 50% | 17% | 7 | 20 | 57% | 10% | 35 }} | ||
{{ItemBoxDropRow | | {{ItemBoxDropRow | Cave 2 | 8% | 2% | 2% | 3% | 18% | 50% | 17% | 9 | 25 | 57% | 10% | 45 }} | ||
{{ItemBoxDropRow | | {{ItemBoxDropRow | Cave 3 | 6% | 2% | 2% | 3% | 18% | 50% | 19% | 11 | 30 | 59% | 10% | 46 }} | ||
{{ItemBoxDropRow | | {{ItemBoxDropRow | Mine 1 | 7% | 2% | 2% | 4% | 18% | 50% | 17% | 13 | 35 | 57% | 10% | 50 }} | ||
{{ItemBoxDropRow | | {{ItemBoxDropRow | Mine 2 | 8% | 2% | 2% | 3% | 18% | 50% | 17% | 15 | 40 | 57% | 10% | 55 }} | ||
{{ItemBoxDropRow | Ruins 1 | 9% | 2% | 2% | 4% | 18% | 50% | 15% | 17 | 45 | 55% | 10% | 60 }} | {{ItemBoxDropRow | Ruins 1 | 9% | 2% | 2% | 4% | 18% | 50% | 15% | 17 | 45 | 55% | 10% | 60 }} | ||
{{ItemBoxDropRow | Ruins 2 | 9% | 3% | 3% | 5% | 18% | 50% | 12% | 19 | 50 | 52% | 10% | 65 }} | {{ItemBoxDropRow | Ruins 2 | 9% | 3% | 3% | 5% | 18% | 50% | 12% | 19 | 50 | 52% | 10% | 65 }} | ||
| Line 32: | Line 32: | ||
|- | |- | ||
!colspan="9"|Episode 2 | !colspan="9"|Episode 2 | ||
{{ItemBoxDropRow | Temple Alpha | 7% | 2% | 2% | 3% | 17% | 47% | 22% | 7 | 20 | 59% | 10% | 30 }} | {{ItemBoxDropRow | VR Temple Alpha | 7% | 2% | 2% | 3% | 17% | 47% | 22% | 7 | 20 | 59% | 10% | 30 }} | ||
{{ItemBoxDropRow | Temple Beta | 7% | 2% | 2% | 3% | 17% | 47% | 22% | 9 | 25 | 59% | 10% | 40 }} | {{ItemBoxDropRow | VR Temple Beta | 7% | 2% | 2% | 3% | 17% | 47% | 22% | 9 | 25 | 59% | 10% | 40 }} | ||
{{ItemBoxDropRow | Spaceship Alpha | 8% | 2% | 2% | 3% | 18% | 50% | 17% | 11 | 30 | 57% | 10% | 45 }} | {{ItemBoxDropRow | VR Spaceship Alpha | 8% | 2% | 2% | 3% | 18% | 50% | 17% | 11 | 30 | 57% | 10% | 45 }} | ||
{{ItemBoxDropRow | Spaceship Beta | 8% | 2% | 2% | 3% | 18% | 50% | 17% | 13 | 35 | 57% | 10% | 50 }} | {{ItemBoxDropRow | VR Spaceship Beta | 8% | 2% | 2% | 3% | 18% | 50% | 17% | 13 | 35 | 57% | 10% | 50 }} | ||
{{ItemBoxDropRow | Jungle North | 6% | 2% | 2% | 3% | 18% | 50% | 19% | 15 | 40 | 59% | 10% | 57 }} | {{ItemBoxDropRow | Jungle Area North | 6% | 2% | 2% | 3% | 18% | 50% | 19% | 15 | 40 | 59% | 10% | 57 }} | ||
{{ItemBoxDropRow | Jungle East | 7% | 2% | 2% | 4% | 18% | 50% | 17% | 17 | 45 | 57% | 10% | 64 }} | {{ItemBoxDropRow | Jungle Area East | 7% | 2% | 2% | 4% | 18% | 50% | 17% | 17 | 45 | 57% | 10% | 64 }} | ||
{{ItemBoxDropRow | Mountain | 8% | 2% | 2% | 3% | 18% | 50% | 17% | 19 | 50 | 57% | 10% | 71 }} | {{ItemBoxDropRow | Mountain Area | 8% | 2% | 2% | 3% | 18% | 50% | 17% | 19 | 50 | 57% | 10% | 71 }} | ||
{{ItemBoxDropRow | Seaside<br> | {{ItemBoxDropRow | Seaside Area<br>Central Control Area | 9% | 2% | 2% | 4% | 18% | 50% | 15% | 21 | 55 | 55% | 10% | 78 }} | ||
{{ItemBoxDropRow | Seabed Upper | 9% | 3% | 3% | 5% | 18% | 50% | 12% | 24 | 60 | 52% | 10% | 85 }} | {{ItemBoxDropRow | Seabed Upper Levels | 9% | 3% | 3% | 5% | 18% | 50% | 12% | 24 | 60 | 52% | 10% | 85 }} | ||
{{ItemBoxDropRow | Seabed Lower<br>Tower | 10% | 3% | 3% | 5% | 18% | 50% | 11% | 26 | 65 | 51% | 10% | 92 }} | {{ItemBoxDropRow | Seabed Lower Levels<br>Control Tower | 10% | 3% | 3% | 5% | 18% | 50% | 11% | 26 | 65 | 51% | 10% | 92 }} | ||
|- | |- | ||
!colspan="9"|Episode 4 | !colspan="9"|Episode 4 | ||
| Line 49: | Line 49: | ||
{{ItemBoxDropRow | Crater North | 7% | 2% | 2% | 4% | 18% | 50% | 17% | 17 | 45 | 57% | 10% | 64 }} | {{ItemBoxDropRow | Crater North | 7% | 2% | 2% | 4% | 18% | 50% | 17% | 17 | 45 | 57% | 10% | 64 }} | ||
{{ItemBoxDropRow | Crater Interior | 8% | 2% | 2% | 3% | 18% | 50% | 17% | 19 | 50 | 57% | 10% | 71 }} | {{ItemBoxDropRow | Crater Interior | 8% | 2% | 2% | 3% | 18% | 50% | 17% | 19 | 50 | 57% | 10% | 71 }} | ||
{{ItemBoxDropRow | | {{ItemBoxDropRow | Subterranean Desert 1 | 9% | 2% | 2% | 4% | 18% | 50% | 15% | 21 | 55 | 55% | 10% | 78 }} | ||
{{ItemBoxDropRow | | {{ItemBoxDropRow | Subterranean Desert 2 | 9% | 3% | 3% | 5% | 18% | 50% | 12% | 24 | 60 | 52% | 10% | 85 }} | ||
{{ItemBoxDropRow | | {{ItemBoxDropRow | Subterranean Desert 3 | 10% | 3% | 3% | 5% | 18% | 50% | 11% | 26 | 65 | 51% | 10% | 92 }} | ||
|} | |} | ||
|-| | |-| | ||
| Line 60: | Line 60: | ||
{{ItemBoxDropRow | Forest 1 | 5% | 2% | 2% | 3% | 11% | 50% | 27% | 20 | 50 | 67% | 10% | 80 }} | {{ItemBoxDropRow | Forest 1 | 5% | 2% | 2% | 3% | 11% | 50% | 27% | 20 | 50 | 67% | 10% | 80 }} | ||
{{ItemBoxDropRow | Forest 2 | 7% | 2% | 2% | 4% | 12% | 50% | 23% | 22 | 55 | 63% | 10% | 87 }} | {{ItemBoxDropRow | Forest 2 | 7% | 2% | 2% | 4% | 12% | 50% | 23% | 22 | 55 | 63% | 10% | 87 }} | ||
{{ItemBoxDropRow | | {{ItemBoxDropRow | Cave 1 | 8% | 3% | 2% | 3% | 12% | 50% | 22% | 24 | 60 | 62% | 10% | 94 }} | ||
{{ItemBoxDropRow | | {{ItemBoxDropRow | Cave 2 | 8% | 2% | 3% | 3% | 12% | 50% | 22% | 26 | 65 | 62% | 10% | 101 }} | ||
{{ItemBoxDropRow | | {{ItemBoxDropRow | Cave 3 | 8% | 2% | 2% | 4% | 12% | 50% | 22% | 28 | 70 | 62% | 10% | 108 }} | ||
{{ItemBoxDropRow | | {{ItemBoxDropRow | Mine 1 | 8% | 3% | 2% | 5% | 13% | 50% | 19% | 30 | 75 | 59% | 10% | 115 }} | ||
{{ItemBoxDropRow | | {{ItemBoxDropRow | Mine 2 | 8% | 2% | 3% | 5% | 13% | 50% | 19% | 32 | 80 | 59% | 10% | 122 }} | ||
{{ItemBoxDropRow | Ruins 1 | 8% | 4% | 4% | 6% | 13% | 50% | 15% | 34 | 85 | 55% | 10% | 129 }} | {{ItemBoxDropRow | Ruins 1 | 8% | 4% | 4% | 6% | 13% | 50% | 15% | 34 | 85 | 55% | 10% | 129 }} | ||
{{ItemBoxDropRow | Ruins 2 | 8% | 4% | 4% | 6% | 13% | 50% | 15% | 36 | 90 | 55% | 10% | 136 }} | {{ItemBoxDropRow | Ruins 2 | 8% | 4% | 4% | 6% | 13% | 50% | 15% | 36 | 90 | 55% | 10% | 136 }} | ||
| Line 70: | Line 70: | ||
|- | |- | ||
!colspan="9"|Episode 2 | !colspan="9"|Episode 2 | ||
{{ItemBoxDropRow | Temple Alpha | 7% | 2% | 2% | 3% | 17% | 50% | 19% | 28 | 70 | 59% | 10% | 80 }} | {{ItemBoxDropRow | VR Temple Alpha | 7% | 2% | 2% | 3% | 17% | 50% | 19% | 28 | 70 | 59% | 10% | 80 }} | ||
{{ItemBoxDropRow | Temple Beta | 7% | 2% | 2% | 3% | 17% | 50% | 19% | 30 | 75 | 59% | 10% | 87 }} | {{ItemBoxDropRow | VR Temple Beta | 7% | 2% | 2% | 3% | 17% | 50% | 19% | 30 | 75 | 59% | 10% | 87 }} | ||
{{ItemBoxDropRow | Spaceship Alpha | 8% | 2% | 2% | 3% | 18% | 50% | 17% | 32 | 80 | 57% | 10% | 94 }} | {{ItemBoxDropRow | VR Spaceship Alpha | 8% | 2% | 2% | 3% | 18% | 50% | 17% | 32 | 80 | 57% | 10% | 94 }} | ||
{{ItemBoxDropRow | Spaceship Beta | 8% | 2% | 2% | 3% | 18% | 50% | 17% | 34 | 85 | 57% | 10% | 101 }} | {{ItemBoxDropRow | VR Spaceship Beta | 8% | 2% | 2% | 3% | 18% | 50% | 17% | 34 | 85 | 57% | 10% | 101 }} | ||
{{ItemBoxDropRow | Jungle North | 6% | 2% | 2% | 3% | 18% | 50% | 19% | 36 | 90 | 59% | 10% | 108 }} | {{ItemBoxDropRow | Jungle Area North | 6% | 2% | 2% | 3% | 18% | 50% | 19% | 36 | 90 | 59% | 10% | 108 }} | ||
{{ItemBoxDropRow | Jungle East | 7% | 2% | 2% | 4% | 18% | 50% | 17% | 38 | 95 | 57% | 10% | 115 }} | {{ItemBoxDropRow | Jungle Area East | 7% | 2% | 2% | 4% | 18% | 50% | 17% | 38 | 95 | 57% | 10% | 115 }} | ||
{{ItemBoxDropRow | Mountain | 8% | 2% | 2% | 3% | 18% | 50% | 17% | 40 | 100 | 57% | 10% | 122 }} | {{ItemBoxDropRow | Mountain Area | 8% | 2% | 2% | 3% | 18% | 50% | 17% | 40 | 100 | 57% | 10% | 122 }} | ||
{{ItemBoxDropRow | Seaside<br> | {{ItemBoxDropRow | Seaside Area<br>Central Control Area | 9% | 2% | 2% | 4% | 18% | 50% | 15% | 42 | 105 | 55% | 10% | 129 }} | ||
{{ItemBoxDropRow | Seabed Upper | 9% | 3% | 3% | 5% | 18% | 50% | 12% | 44 | 110 | 52% | 10% | 136 }} | {{ItemBoxDropRow | Seabed Upper Levels | 9% | 3% | 3% | 5% | 18% | 50% | 12% | 44 | 110 | 52% | 10% | 136 }} | ||
{{ItemBoxDropRow | Seabed Lower<br>Tower | 10% | 3% | 3% | 5% | 18% | 50% | 11% | 46 | 115 | 51% | 10% | 143 }} | {{ItemBoxDropRow | Seabed Lower Levels<br>Control Tower | 10% | 3% | 3% | 5% | 18% | 50% | 11% | 46 | 115 | 51% | 10% | 143 }} | ||
|- | |- | ||
!colspan="9"|Episode 4 | !colspan="9"|Episode 4 | ||
| Line 87: | Line 87: | ||
{{ItemBoxDropRow | Crater North | 7% | 2% | 2% | 4% | 18% | 50% | 17% | 38 | 95 | 57% | 10% | 115 }} | {{ItemBoxDropRow | Crater North | 7% | 2% | 2% | 4% | 18% | 50% | 17% | 38 | 95 | 57% | 10% | 115 }} | ||
{{ItemBoxDropRow | Crater Interior | 8% | 2% | 2% | 3% | 18% | 50% | 17% | 40 | 100 | 57% | 10% | 122 }} | {{ItemBoxDropRow | Crater Interior | 8% | 2% | 2% | 3% | 18% | 50% | 17% | 40 | 100 | 57% | 10% | 122 }} | ||
{{ItemBoxDropRow | | {{ItemBoxDropRow | Subterranean Desert 1 | 9% | 2% | 2% | 4% | 18% | 50% | 15% | 42 | 105 | 55% | 10% | 129 }} | ||
{{ItemBoxDropRow | | {{ItemBoxDropRow | Subterranean Desert 2 | 9% | 3% | 3% | 5% | 18% | 50% | 12% | 44 | 110 | 52% | 10% | 136 }} | ||
{{ItemBoxDropRow | | {{ItemBoxDropRow | Subterranean Desert 3 | 10% | 3% | 3% | 5% | 18% | 50% | 11% | 46 | 115 | 51% | 10% | 143 }} | ||
|} | |} | ||
|-| | |-| | ||
| Line 98: | Line 98: | ||
{{ItemBoxDropRow | Forest 1 | 5% | 2% | 2% | 3% | 8% | 50% | 30% | 40 | 100 | 70% | 10% | 150 }} | {{ItemBoxDropRow | Forest 1 | 5% | 2% | 2% | 3% | 8% | 50% | 30% | 40 | 100 | 70% | 10% | 150 }} | ||
{{ItemBoxDropRow | Forest 2 | 6% | 2% | 2% | 4% | 9% | 50% | 27% | 42 | 105 | 67% | 10% | 157 }} | {{ItemBoxDropRow | Forest 2 | 6% | 2% | 2% | 4% | 9% | 50% | 27% | 42 | 105 | 67% | 10% | 157 }} | ||
{{ItemBoxDropRow | | {{ItemBoxDropRow | Cave 1 | 7% | 3% | 2% | 4% | 10% | 50% | 24% | 44 | 110 | 64% | 10% | 164 }} | ||
{{ItemBoxDropRow | | {{ItemBoxDropRow | Cave 2 | 7% | 2% | 3% | 4% | 10% | 50% | 24% | 46 | 115 | 64% | 10% | 171 }} | ||
{{ItemBoxDropRow | | {{ItemBoxDropRow | Cave 3 | 7% | 2% | 2% | 5% | 10% | 50% | 24% | 48 | 120 | 64% | 10% | 178 }} | ||
{{ItemBoxDropRow | | {{ItemBoxDropRow | Mine 1 | 7% | 3% | 3% | 5% | 10% | 50% | 22% | 50 | 125 | 62% | 10% | 185 }} | ||
{{ItemBoxDropRow | | {{ItemBoxDropRow | Mine 2 | 7% | 3% | 3% | 5% | 10% | 50% | 22% | 52 | 130 | 62% | 10% | 192 }} | ||
{{ItemBoxDropRow | Ruins 1 | 7% | 4% | 3% | 6% | 10% | 50% | 20% | 54 | 135 | 60% | 10% | 199 }} | {{ItemBoxDropRow | Ruins 1 | 7% | 4% | 3% | 6% | 10% | 50% | 20% | 54 | 135 | 60% | 10% | 199 }} | ||
{{ItemBoxDropRow | Ruins 2 | 8% | 3% | 3% | 7% | 9% | 50% | 20% | 56 | 140 | 60% | 10% | 206 }} | {{ItemBoxDropRow | Ruins 2 | 8% | 3% | 3% | 7% | 9% | 50% | 20% | 56 | 140 | 60% | 10% | 206 }} | ||
| Line 108: | Line 108: | ||
|- | |- | ||
!colspan="9"|Episode 2 | !colspan="9"|Episode 2 | ||
{{ItemBoxDropRow | Temple Alpha | 5% | 2% | 2% | 3% | 8% | 50% | 30% | 48 | 120 | 70% | 10% | 150 }} | {{ItemBoxDropRow | VR Temple Alpha | 5% | 2% | 2% | 3% | 8% | 50% | 30% | 48 | 120 | 70% | 10% | 150 }} | ||
{{ItemBoxDropRow | Temple Beta | 6% | 2% | 2% | 4% | 9% | 50% | 27% | 50 | 125 | 67% | 10% | 157 }} | {{ItemBoxDropRow | VR Temple Beta | 6% | 2% | 2% | 4% | 9% | 50% | 27% | 50 | 125 | 67% | 10% | 157 }} | ||
{{ItemBoxDropRow | Spaceship Alpha | 7% | 3% | 2% | 4% | 10% | 50% | 24% | 52 | 130 | 64% | 10% | 164 }} | {{ItemBoxDropRow | VR Spaceship Alpha | 7% | 3% | 2% | 4% | 10% | 50% | 24% | 52 | 130 | 64% | 10% | 164 }} | ||
{{ItemBoxDropRow | Spaceship Beta | 7% | 2% | 3% | 4% | 10% | 50% | 24% | 54 | 135 | 64% | 10% | 171 }} | {{ItemBoxDropRow | VR Spaceship Beta | 7% | 2% | 3% | 4% | 10% | 50% | 24% | 54 | 135 | 64% | 10% | 171 }} | ||
{{ItemBoxDropRow | Jungle North | 7% | 2% | 2% | 5% | 10% | 50% | 24% | 56 | 140 | 64% | 10% | 178 }} | {{ItemBoxDropRow | Jungle Area North | 7% | 2% | 2% | 5% | 10% | 50% | 24% | 56 | 140 | 64% | 10% | 178 }} | ||
{{ItemBoxDropRow | Jungle East | 7% | 3% | 3% | 5% | 10% | 50% | 22% | 58 | 145 | 62% | 10% | 185 }} | {{ItemBoxDropRow | Jungle Area East | 7% | 3% | 3% | 5% | 10% | 50% | 22% | 58 | 145 | 62% | 10% | 185 }} | ||
{{ItemBoxDropRow | Mountain | 7% | 3% | 3% | 5% | 10% | 50% | 22% | 60 | 150 | 62% | 10% | 192 }} | {{ItemBoxDropRow | Mountain Area | 7% | 3% | 3% | 5% | 10% | 50% | 22% | 60 | 150 | 62% | 10% | 192 }} | ||
{{ItemBoxDropRow | Seaside<br> | {{ItemBoxDropRow | Seaside Area<br>Central Control Area | 7% | 4% | 3% | 6% | 10% | 50% | 20% | 62 | 155 | 60% | 10% | 199 }} | ||
{{ItemBoxDropRow | Seabed Upper | 8% | 3% | 3% | 7% | 9% | 50% | 20% | 64 | 160 | 60% | 10% | 206 }} | {{ItemBoxDropRow | Seabed Upper Levels | 8% | 3% | 3% | 7% | 9% | 50% | 20% | 64 | 160 | 60% | 10% | 206 }} | ||
{{ItemBoxDropRow | Seabed Lower<br>Tower | 8% | 3% | 3% | 7% | 9% | 50% | 20% | 66 | 165 | 60% | 10% | 213 }} | {{ItemBoxDropRow | Seabed Lower Levels<br>Control Tower | 8% | 3% | 3% | 7% | 9% | 50% | 20% | 66 | 165 | 60% | 10% | 213 }} | ||
|- | |- | ||
!colspan="9"|Episode 4 | !colspan="9"|Episode 4 | ||
| Line 125: | Line 125: | ||
{{ItemBoxDropRow | Crater North | 7% | 3% | 3% | 5% | 10% | 50% | 22% | 58 | 145 | 62% | 10% | 185 }} | {{ItemBoxDropRow | Crater North | 7% | 3% | 3% | 5% | 10% | 50% | 22% | 58 | 145 | 62% | 10% | 185 }} | ||
{{ItemBoxDropRow | Crater Interior | 7% | 3% | 3% | 5% | 10% | 50% | 22% | 60 | 150 | 62% | 10% | 192 }} | {{ItemBoxDropRow | Crater Interior | 7% | 3% | 3% | 5% | 10% | 50% | 22% | 60 | 150 | 62% | 10% | 192 }} | ||
{{ItemBoxDropRow | | {{ItemBoxDropRow | Subterranean Desert 1 | 7% | 4% | 3% | 6% | 10% | 50% | 20% | 62 | 155 | 60% | 10% | 199 }} | ||
{{ItemBoxDropRow | | {{ItemBoxDropRow | Subterranean Desert 2 | 8% | 3% | 3% | 7% | 9% | 50% | 20% | 64 | 160 | 60% | 10% | 206 }} | ||
{{ItemBoxDropRow | | {{ItemBoxDropRow | Subterranean Desert 3 | 8% | 3% | 3% | 7% | 9% | 50% | 20% | 66 | 165 | 60% | 10% | 213 }} | ||
|} | |} | ||
|-| | |-| | ||
| Line 136: | Line 136: | ||
{{ItemBoxDropRow | Forest 1 | 6% | 3% | 3% | 4% | 10% | 50% | 24% | 60 | 150 | 64% | 10% | 220 }} | {{ItemBoxDropRow | Forest 1 | 6% | 3% | 3% | 4% | 10% | 50% | 24% | 60 | 150 | 64% | 10% | 220 }} | ||
{{ItemBoxDropRow | Forest 2 | 7% | 3% | 3% | 5% | 10% | 50% | 22% | 62 | 155 | 62% | 10% | 227 }} | {{ItemBoxDropRow | Forest 2 | 7% | 3% | 3% | 5% | 10% | 50% | 22% | 62 | 155 | 62% | 10% | 227 }} | ||
{{ItemBoxDropRow | | {{ItemBoxDropRow | Cave 1 | 8% | 3% | 4% | 5% | 10% | 50% | 20% | 66 | 165 | 60% | 10% | 241 }} | ||
{{ItemBoxDropRow | | {{ItemBoxDropRow | Cave 2 | 8% | 4% | 3% | 5% | 10% | 50% | 20% | 64 | 160 | 60% | 10% | 234 }} | ||
{{ItemBoxDropRow | | {{ItemBoxDropRow | Cave 3 | 8% | 3% | 3% | 6% | 10% | 50% | 20% | 68 | 170 | 60% | 10% | 248 }} | ||
{{ItemBoxDropRow | | {{ItemBoxDropRow | Mine 1 | 8% | 4% | 4% | 6% | 10% | 50% | 18% | 70 | 175 | 58% | 10% | 255 }} | ||
{{ItemBoxDropRow | | {{ItemBoxDropRow | Mine 2 | 8% | 4% | 4% | 6% | 10% | 50% | 18% | 72 | 180 | 58% | 10% | 262 }} | ||
{{ItemBoxDropRow | Ruins 1 | 8% | 5% | 4% | 7% | 10% | 50% | 16% | 74 | 185 | 56% | 10% | 269 }} | {{ItemBoxDropRow | Ruins 1 | 8% | 5% | 4% | 7% | 10% | 50% | 16% | 74 | 185 | 56% | 10% | 269 }} | ||
{{ItemBoxDropRow | Ruins 2 | 9% | 4% | 4% | 8% | 10% | 50% | 15% | 76 | 190 | 55% | 10% | 276 }} | {{ItemBoxDropRow | Ruins 2 | 9% | 4% | 4% | 8% | 10% | 50% | 15% | 76 | 190 | 55% | 10% | 276 }} | ||
| Line 146: | Line 146: | ||
|- | |- | ||
!colspan="9"|Episode 2 | !colspan="9"|Episode 2 | ||
{{ItemBoxDropRow | Temple Alpha | 5% | 2% | 2% | 3% | 10% | 50% | 28% | 68 | 170 | 68% | 10% | 220 }} | {{ItemBoxDropRow | VR Temple Alpha | 5% | 2% | 2% | 3% | 10% | 50% | 28% | 68 | 170 | 68% | 10% | 220 }} | ||
{{ItemBoxDropRow | Temple Beta | 6% | 2% | 2% | 4% | 10% | 50% | 26% | 70 | 175 | 66% | 10% | 227 }} | {{ItemBoxDropRow | VR Temple Beta | 6% | 2% | 2% | 4% | 10% | 50% | 26% | 70 | 175 | 66% | 10% | 227 }} | ||
{{ItemBoxDropRow | Spaceship Alpha | 7% | 3% | 2% | 4% | 10% | 50% | 24% | 72 | 180 | 64% | 10% | 234 }} | {{ItemBoxDropRow | VR Spaceship Alpha | 7% | 3% | 2% | 4% | 10% | 50% | 24% | 72 | 180 | 64% | 10% | 234 }} | ||
{{ItemBoxDropRow | Spaceship Beta | 7% | 2% | 3% | 4% | 10% | 50% | 24% | 74 | 185 | 64% | 10% | 241 }} | {{ItemBoxDropRow | VR Spaceship Beta | 7% | 2% | 3% | 4% | 10% | 50% | 24% | 74 | 185 | 64% | 10% | 241 }} | ||
{{ItemBoxDropRow | Jungle North | 7% | 2% | 2% | 5% | 10% | 50% | 24% | 76 | 190 | 64% | 10% | 248 }} | {{ItemBoxDropRow | Jungle Area North | 7% | 2% | 2% | 5% | 10% | 50% | 24% | 76 | 190 | 64% | 10% | 248 }} | ||
{{ItemBoxDropRow | Jungle East | 7% | 3% | 3% | 5% | 10% | 50% | 22% | 78 | 195 | 62% | 10% | 255 }} | {{ItemBoxDropRow | Jungle Area East | 7% | 3% | 3% | 5% | 10% | 50% | 22% | 78 | 195 | 62% | 10% | 255 }} | ||
{{ItemBoxDropRow | Mountain | 7% | 3% | 3% | 5% | 10% | 50% | 22% | 80 | 200 | 62% | 10% | 262 }} | {{ItemBoxDropRow | Mountain Area | 7% | 3% | 3% | 5% | 10% | 50% | 22% | 80 | 200 | 62% | 10% | 262 }} | ||
{{ItemBoxDropRow | Seaside<br> | {{ItemBoxDropRow | Seaside Area<br>Central Control Area | 7% | 4% | 3% | 6% | 10% | 50% | 20% | 82 | 205 | 60% | 10% | 269 }} | ||
{{ItemBoxDropRow | Seabed Upper | 8% | 3% | 3% | 7% | 10% | 50% | 19% | 84 | 210 | 59% | 10% | 276 }} | {{ItemBoxDropRow | Seabed Upper Levels | 8% | 3% | 3% | 7% | 10% | 50% | 19% | 84 | 210 | 59% | 10% | 276 }} | ||
{{ItemBoxDropRow | Seabed Lower<br>Tower | 8% | 3% | 3% | 7% | 10% | 50% | 19% | 86 | 215 | 59% | 10% | 283 }} | {{ItemBoxDropRow | Seabed Lower Levels<br>Control Tower | 8% | 3% | 3% | 7% | 10% | 50% | 19% | 86 | 215 | 59% | 10% | 283 }} | ||
|- | |- | ||
!colspan="9"|Episode 4 | !colspan="9"|Episode 4 | ||
| Line 163: | Line 163: | ||
{{ItemBoxDropRow | Crater North | 7% | 3% | 3% | 5% | 10% | 50% | 22% | 78 | 195 | 62% | 10% | 255 }} | {{ItemBoxDropRow | Crater North | 7% | 3% | 3% | 5% | 10% | 50% | 22% | 78 | 195 | 62% | 10% | 255 }} | ||
{{ItemBoxDropRow | Crater Interior | 7% | 3% | 3% | 5% | 10% | 50% | 22% | 80 | 200 | 62% | 10% | 262 }} | {{ItemBoxDropRow | Crater Interior | 7% | 3% | 3% | 5% | 10% | 50% | 22% | 80 | 200 | 62% | 10% | 262 }} | ||
{{ItemBoxDropRow | | {{ItemBoxDropRow | Subterranean Desert 1 | 7% | 4% | 3% | 6% | 10% | 50% | 20% | 82 | 205 | 60% | 10% | 269 }} | ||
{{ItemBoxDropRow | | {{ItemBoxDropRow | Subterranean Desert 2 | 8% | 3% | 3% | 7% | 10% | 50% | 19% | 84 | 210 | 59% | 10% | 276 }} | ||
{{ItemBoxDropRow | | {{ItemBoxDropRow | Subterranean Desert 3 | 8% | 3% | 3% | 7% | 10% | 50% | 19% | 86 | 215 | 59% | 10% | 283 }} | ||
|} | |} | ||
|-| | |-| | ||
| Line 186: | Line 186: | ||
| Forest 2 || 2% || 1% || 1% || 4% || 67% || N/A || 25% || N/A | | Forest 2 || 2% || 1% || 1% || 4% || 67% || N/A || 25% || N/A | ||
|- | |- | ||
| | | Cave 1 || 2% || 1% || 1% || 4% || 62% || N/A || 30% || N/A | ||
|- | |- | ||
| | | Cave 2 || 2% || 1% || 1% || 5% || 61% || N/A || 30% || N/A | ||
|- | |- | ||
| | | Cave 3 || 2% || 1% || 1% || 5% || 66% || N/A || 25% || N/A | ||
|- | |- | ||
| | | Mine 1 || 2% || 1% || 1% || 5% || 61% || N/A || 30% || N/A | ||
|- | |- | ||
| | | Mine 2 || 2% || 1% || 1% || 6% || 65% || N/A || 25% || N/A | ||
|- | |- | ||
| Ruins 1 || 2% || 1% || 1% || 6% || 60% || N/A || 30% || N/A | | Ruins 1 || 2% || 1% || 1% || 6% || 60% || N/A || 30% || N/A | ||
| Line 204: | Line 204: | ||
!colspan="9"| Episode 2 | !colspan="9"| Episode 2 | ||
|- | |- | ||
| Temple Alpha || 2% || 1% || 1% || 4% || 62% || N/A || 30% || N/A | | VR Temple Alpha || 2% || 1% || 1% || 4% || 62% || N/A || 30% || N/A | ||
|- | |- | ||
| Temple Beta || 2% || 1% || 1% || 4% || 67% || N/A || 25% || N/A | | VR Temple Beta || 2% || 1% || 1% || 4% || 67% || N/A || 25% || N/A | ||
|- | |- | ||
| Spaceship Alpha || 2% || 1% || 1% || 4% || 62% || N/A || 30% || N/A | | VR Spaceship Alpha || 2% || 1% || 1% || 4% || 62% || N/A || 30% || N/A | ||
|- | |- | ||
| Spaceship Beta || 2% || 1% || 1% || 5% || 61% || N/A || 30% || N/A | | VR Spaceship Beta || 2% || 1% || 1% || 5% || 61% || N/A || 30% || N/A | ||
|- | |- | ||
| Jungle North || 2% || 1% || 1% || 5% || 66% || N/A || 25% || N/A | | Jungle Area North || 2% || 1% || 1% || 5% || 66% || N/A || 25% || N/A | ||
|- | |- | ||
| Jungle East || 2% || 1% || 1% || 5% || 61% || N/A || 30% || N/A | | Jungle Area East || 2% || 1% || 1% || 5% || 61% || N/A || 30% || N/A | ||
|- | |- | ||
| Mountain || 2% || 1% || 1% || 6% || 65% || N/A || 25% || N/A | | Mountain Area || 2% || 1% || 1% || 6% || 65% || N/A || 25% || N/A | ||
|- | |- | ||
| Seaside<br> | | Seaside Area<br>Central Control Area || 2% || 1% || 1% || 6% || 60% || N/A || 30% || N/A | ||
|- | |- | ||
| Seabed Upper || 2% || 1% || 1% || 6% || 60% || N/A || 30% || N/A | | Seabed Upper Levels || 2% || 1% || 1% || 6% || 60% || N/A || 30% || N/A | ||
|- | |- | ||
| Seabed Lower<br>Tower || 2% || 1% || 1% || 6% || 65% || N/A || 25% || N/A | | Seabed Lower Levels<br>Control Tower || 2% || 1% || 1% || 6% || 65% || N/A || 25% || N/A | ||
|} | |} | ||
</tabber> | </tabber> | ||
Revision as of 23:12, 4 February 2025
Item boxes are objects which can be found on the surface of Ragol in the various Areas. They can be destroyed by striking them with either Weapons or Techniques (with the exception of ![]() Megid), and can produce
Megid), and can produce ![]()
![]()
![]() Weapons;
Weapons; ![]() Frames,
Frames, ![]() Barriers, or
Barriers, or ![]() Units;
Units; ![]() Tools; or
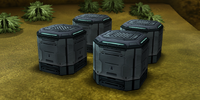
Tools; or ![]() Meseta. Some areas (such as Ruins and Subterranean Desert) will change the look of Item boxes to match the area's aesthetic.
Meseta. Some areas (such as Ruins and Subterranean Desert) will change the look of Item boxes to match the area's aesthetic.
Some Item boxes may be set to drop specific items (e.g. some boxes in ![]() 1-1:Planet Ragol will only ever drop
1-1:Planet Ragol will only ever drop ![]() Monomates), or specific categories of items (e.g. some boxes in
Monomates), or specific categories of items (e.g. some boxes in ![]() 1-3:Subterranean Den will only ever drop Tools).
1-3:Subterranean Den will only ever drop Tools).
Hunting for item boxes can be an efficient way to obtain ![]() Meseta, common weapons or certain rare items. The most efficient way to access a multitude of item boxes is explained in the box run guide.
Meseta, common weapons or certain rare items. The most efficient way to access a multitude of item boxes is explained in the box run guide.
Item box drops are not affected by any drop rate bonuses, including (but not limited to):
- Drop anything rate (DAR);
- Rare drop rate (RDR);
- Anguish common weapon rates;
 Photon Drop drop bonuses;
- Event drop rate bonuses;
- Altered weapon percentage patterns from Anguish
Item box drop tables
| Area | Weapon | Frame | Barrier | Unit | Tool | Meseta | Nothing | Meseta Amount |
|---|---|---|---|---|---|---|---|---|
| Episode 1 | ||||||||
| Forest 1 | 7% | 2% | 2% | 0% | 17% | 50% | 22% | 3 - 10 |
| Forest 2 | 7% | 2% | 2% | 0% | 17% | 50% | 22% | 5 - 15 |
| Cave 1 | 8% | 2% | 2% | 3% | 18% | 50% | 17% | 7 - 20 |
| Cave 2 | 8% | 2% | 2% | 3% | 18% | 50% | 17% | 9 - 25 |
| Cave 3 | 6% | 2% | 2% | 3% | 18% | 50% | 19% | 11 - 30 |
| Mine 1 | 7% | 2% | 2% | 4% | 18% | 50% | 17% | 13 - 35 |
| Mine 2 | 8% | 2% | 2% | 3% | 18% | 50% | 17% | 15 - 40 |
| Ruins 1 | 9% | 2% | 2% | 4% | 18% | 50% | 15% | 17 - 45 |
| Ruins 2 | 9% | 3% | 3% | 5% | 18% | 50% | 12% | 19 - 50 |
| Ruins 3 | 10% | 3% | 3% | 5% | 18% | 50% | 11% | 21 - 55 |
| Episode 2 | ||||||||
| VR Temple Alpha | 7% | 2% | 2% | 3% | 17% | 47% | 22% | 7 - 20 |
| VR Temple Beta | 7% | 2% | 2% | 3% | 17% | 47% | 22% | 9 - 25 |
| VR Spaceship Alpha | 8% | 2% | 2% | 3% | 18% | 50% | 17% | 11 - 30 |
| VR Spaceship Beta | 8% | 2% | 2% | 3% | 18% | 50% | 17% | 13 - 35 |
| Jungle Area North | 6% | 2% | 2% | 3% | 18% | 50% | 19% | 15 - 40 |
| Jungle Area East | 7% | 2% | 2% | 4% | 18% | 50% | 17% | 17 - 45 |
| Mountain Area | 8% | 2% | 2% | 3% | 18% | 50% | 17% | 19 - 50 |
| Seaside Area Central Control Area |
9% | 2% | 2% | 4% | 18% | 50% | 15% | 21 - 55 |
| Seabed Upper Levels | 9% | 3% | 3% | 5% | 18% | 50% | 12% | 24 - 60 |
| Seabed Lower Levels Control Tower |
10% | 3% | 3% | 5% | 18% | 50% | 11% | 26 - 65 |
| Episode 4 | ||||||||
| Crater East | 8% | 2% | 2% | 3% | 18% | 50% | 17% | 11 - 30 |
| Crater West | 8% | 2% | 2% | 3% | 18% | 50% | 17% | 13 - 35 |
| Crater South | 6% | 2% | 2% | 3% | 18% | 50% | 19% | 15 - 40 |
| Crater North | 7% | 2% | 2% | 4% | 18% | 50% | 17% | 17 - 45 |
| Crater Interior | 8% | 2% | 2% | 3% | 18% | 50% | 17% | 19 - 50 |
| Subterranean Desert 1 | 9% | 2% | 2% | 4% | 18% | 50% | 15% | 21 - 55 |
| Subterranean Desert 2 | 9% | 3% | 3% | 5% | 18% | 50% | 12% | 24 - 60 |
| Subterranean Desert 3 | 10% | 3% | 3% | 5% | 18% | 50% | 11% | 26 - 65 |
| Area | Weapon | Frame | Barrier | Unit | Tool | Meseta | Nothing | Meseta Amount |
|---|---|---|---|---|---|---|---|---|
| Episode 1 | ||||||||
| Forest 1 | 5% | 2% | 2% | 3% | 11% | 50% | 27% | 20 - 50 |
| Forest 2 | 7% | 2% | 2% | 4% | 12% | 50% | 23% | 22 - 55 |
| Cave 1 | 8% | 3% | 2% | 3% | 12% | 50% | 22% | 24 - 60 |
| Cave 2 | 8% | 2% | 3% | 3% | 12% | 50% | 22% | 26 - 65 |
| Cave 3 | 8% | 2% | 2% | 4% | 12% | 50% | 22% | 28 - 70 |
| Mine 1 | 8% | 3% | 2% | 5% | 13% | 50% | 19% | 30 - 75 |
| Mine 2 | 8% | 2% | 3% | 5% | 13% | 50% | 19% | 32 - 80 |
| Ruins 1 | 8% | 4% | 4% | 6% | 13% | 50% | 15% | 34 - 85 |
| Ruins 2 | 8% | 4% | 4% | 6% | 13% | 50% | 15% | 36 - 90 |
| Ruins 3 | 9% | 4% | 4% | 6% | 13% | 50% | 14% | 38 - 95 |
| Episode 2 | ||||||||
| VR Temple Alpha | 7% | 2% | 2% | 3% | 17% | 50% | 19% | 28 - 70 |
| VR Temple Beta | 7% | 2% | 2% | 3% | 17% | 50% | 19% | 30 - 75 |
| VR Spaceship Alpha | 8% | 2% | 2% | 3% | 18% | 50% | 17% | 32 - 80 |
| VR Spaceship Beta | 8% | 2% | 2% | 3% | 18% | 50% | 17% | 34 - 85 |
| Jungle Area North | 6% | 2% | 2% | 3% | 18% | 50% | 19% | 36 - 90 |
| Jungle Area East | 7% | 2% | 2% | 4% | 18% | 50% | 17% | 38 - 95 |
| Mountain Area | 8% | 2% | 2% | 3% | 18% | 50% | 17% | 40 - 100 |
| Seaside Area Central Control Area |
9% | 2% | 2% | 4% | 18% | 50% | 15% | 42 - 105 |
| Seabed Upper Levels | 9% | 3% | 3% | 5% | 18% | 50% | 12% | 44 - 110 |
| Seabed Lower Levels Control Tower |
10% | 3% | 3% | 5% | 18% | 50% | 11% | 46 - 115 |
| Episode 4 | ||||||||
| Crater East | 8% | 2% | 2% | 3% | 18% | 50% | 17% | 32 - 80 |
| Crater West | 8% | 2% | 2% | 3% | 18% | 50% | 17% | 34 - 85 |
| Crater South | 6% | 2% | 2% | 3% | 18% | 50% | 19% | 36 - 90 |
| Crater North | 7% | 2% | 2% | 4% | 18% | 50% | 17% | 38 - 95 |
| Crater Interior | 8% | 2% | 2% | 3% | 18% | 50% | 17% | 40 - 100 |
| Subterranean Desert 1 | 9% | 2% | 2% | 4% | 18% | 50% | 15% | 42 - 105 |
| Subterranean Desert 2 | 9% | 3% | 3% | 5% | 18% | 50% | 12% | 44 - 110 |
| Subterranean Desert 3 | 10% | 3% | 3% | 5% | 18% | 50% | 11% | 46 - 115 |
| Area | Weapon | Frame | Barrier | Unit | Tool | Meseta | Nothing | Meseta Amount |
|---|---|---|---|---|---|---|---|---|
| Episode 1 | ||||||||
| Forest 1 | 5% | 2% | 2% | 3% | 8% | 50% | 30% | 40 - 100 |
| Forest 2 | 6% | 2% | 2% | 4% | 9% | 50% | 27% | 42 - 105 |
| Cave 1 | 7% | 3% | 2% | 4% | 10% | 50% | 24% | 44 - 110 |
| Cave 2 | 7% | 2% | 3% | 4% | 10% | 50% | 24% | 46 - 115 |
| Cave 3 | 7% | 2% | 2% | 5% | 10% | 50% | 24% | 48 - 120 |
| Mine 1 | 7% | 3% | 3% | 5% | 10% | 50% | 22% | 50 - 125 |
| Mine 2 | 7% | 3% | 3% | 5% | 10% | 50% | 22% | 52 - 130 |
| Ruins 1 | 7% | 4% | 3% | 6% | 10% | 50% | 20% | 54 - 135 |
| Ruins 2 | 8% | 3% | 3% | 7% | 9% | 50% | 20% | 56 - 140 |
| Ruins 3 | 8% | 3% | 3% | 7% | 9% | 50% | 20% | 58 - 145 |
| Episode 2 | ||||||||
| VR Temple Alpha | 5% | 2% | 2% | 3% | 8% | 50% | 30% | 48 - 120 |
| VR Temple Beta | 6% | 2% | 2% | 4% | 9% | 50% | 27% | 50 - 125 |
| VR Spaceship Alpha | 7% | 3% | 2% | 4% | 10% | 50% | 24% | 52 - 130 |
| VR Spaceship Beta | 7% | 2% | 3% | 4% | 10% | 50% | 24% | 54 - 135 |
| Jungle Area North | 7% | 2% | 2% | 5% | 10% | 50% | 24% | 56 - 140 |
| Jungle Area East | 7% | 3% | 3% | 5% | 10% | 50% | 22% | 58 - 145 |
| Mountain Area | 7% | 3% | 3% | 5% | 10% | 50% | 22% | 60 - 150 |
| Seaside Area Central Control Area |
7% | 4% | 3% | 6% | 10% | 50% | 20% | 62 - 155 |
| Seabed Upper Levels | 8% | 3% | 3% | 7% | 9% | 50% | 20% | 64 - 160 |
| Seabed Lower Levels Control Tower |
8% | 3% | 3% | 7% | 9% | 50% | 20% | 66 - 165 |
| Episode 4 | ||||||||
| Crater East | 7% | 3% | 2% | 4% | 10% | 50% | 24% | 52 - 130 |
| Crater West | 7% | 2% | 3% | 4% | 10% | 50% | 24% | 54 - 135 |
| Crater South | 7% | 2% | 2% | 5% | 10% | 50% | 24% | 56 - 140 |
| Crater North | 7% | 3% | 3% | 5% | 10% | 50% | 22% | 58 - 145 |
| Crater Interior | 7% | 3% | 3% | 5% | 10% | 50% | 22% | 60 - 150 |
| Subterranean Desert 1 | 7% | 4% | 3% | 6% | 10% | 50% | 20% | 62 - 155 |
| Subterranean Desert 2 | 8% | 3% | 3% | 7% | 9% | 50% | 20% | 64 - 160 |
| Subterranean Desert 3 | 8% | 3% | 3% | 7% | 9% | 50% | 20% | 66 - 165 |
| Area | Weapon | Frame | Barrier | Unit | Tool | Meseta | Nothing | Meseta Amount |
|---|---|---|---|---|---|---|---|---|
| Episode 1 | ||||||||
| Forest 1 | 6% | 3% | 3% | 4% | 10% | 50% | 24% | 60 - 150 |
| Forest 2 | 7% | 3% | 3% | 5% | 10% | 50% | 22% | 62 - 155 |
| Cave 1 | 8% | 3% | 4% | 5% | 10% | 50% | 20% | 66 - 165 |
| Cave 2 | 8% | 4% | 3% | 5% | 10% | 50% | 20% | 64 - 160 |
| Cave 3 | 8% | 3% | 3% | 6% | 10% | 50% | 20% | 68 - 170 |
| Mine 1 | 8% | 4% | 4% | 6% | 10% | 50% | 18% | 70 - 175 |
| Mine 2 | 8% | 4% | 4% | 6% | 10% | 50% | 18% | 72 - 180 |
| Ruins 1 | 8% | 5% | 4% | 7% | 10% | 50% | 16% | 74 - 185 |
| Ruins 2 | 9% | 4% | 4% | 8% | 10% | 50% | 15% | 76 - 190 |
| Ruins 3 | 9% | 4% | 4% | 8% | 10% | 50% | 15% | 78 - 195 |
| Episode 2 | ||||||||
| VR Temple Alpha | 5% | 2% | 2% | 3% | 10% | 50% | 28% | 68 - 170 |
| VR Temple Beta | 6% | 2% | 2% | 4% | 10% | 50% | 26% | 70 - 175 |
| VR Spaceship Alpha | 7% | 3% | 2% | 4% | 10% | 50% | 24% | 72 - 180 |
| VR Spaceship Beta | 7% | 2% | 3% | 4% | 10% | 50% | 24% | 74 - 185 |
| Jungle Area North | 7% | 2% | 2% | 5% | 10% | 50% | 24% | 76 - 190 |
| Jungle Area East | 7% | 3% | 3% | 5% | 10% | 50% | 22% | 78 - 195 |
| Mountain Area | 7% | 3% | 3% | 5% | 10% | 50% | 22% | 80 - 200 |
| Seaside Area Central Control Area |
7% | 4% | 3% | 6% | 10% | 50% | 20% | 82 - 205 |
| Seabed Upper Levels | 8% | 3% | 3% | 7% | 10% | 50% | 19% | 84 - 210 |
| Seabed Lower Levels Control Tower |
8% | 3% | 3% | 7% | 10% | 50% | 19% | 86 - 215 |
| Episode 4 | ||||||||
| Crater East | 7% | 3% | 2% | 4% | 10% | 50% | 24% | 72 - 180 |
| Crater West | 7% | 2% | 3% | 4% | 10% | 50% | 24% | 74 - 185 |
| Crater South | 7% | 2% | 2% | 5% | 10% | 50% | 24% | 76 - 190 |
| Crater North | 7% | 3% | 3% | 5% | 10% | 50% | 22% | 78 - 195 |
| Crater Interior | 7% | 3% | 3% | 5% | 10% | 50% | 22% | 80 - 200 |
| Subterranean Desert 1 | 7% | 4% | 3% | 6% | 10% | 50% | 20% | 82 - 205 |
| Subterranean Desert 2 | 8% | 3% | 3% | 7% | 10% | 50% | 19% | 84 - 210 |
| Subterranean Desert 3 | 8% | 3% | 3% | 7% | 10% | 50% | 19% | 86 - 215 |
| Area | Weapon | Frame | Barrier | Unit | Tool | Meseta | Nothing | Meseta Amount |
|---|---|---|---|---|---|---|---|---|
| Episode 1 | ||||||||
| Forest 1 | 2% | 1% | 1% | 4% | 62% | N/A | 30% | N/A |
| Forest 2 | 2% | 1% | 1% | 4% | 67% | N/A | 25% | N/A |
| Cave 1 | 2% | 1% | 1% | 4% | 62% | N/A | 30% | N/A |
| Cave 2 | 2% | 1% | 1% | 5% | 61% | N/A | 30% | N/A |
| Cave 3 | 2% | 1% | 1% | 5% | 66% | N/A | 25% | N/A |
| Mine 1 | 2% | 1% | 1% | 5% | 61% | N/A | 30% | N/A |
| Mine 2 | 2% | 1% | 1% | 6% | 65% | N/A | 25% | N/A |
| Ruins 1 | 2% | 1% | 1% | 6% | 60% | N/A | 30% | N/A |
| Ruins 2 | 2% | 1% | 1% | 6% | 60% | N/A | 30% | N/A |
| Ruins 3 | 2% | 1% | 1% | 6% | 65% | N/A | 25% | N/A |
| Episode 2 | ||||||||
| VR Temple Alpha | 2% | 1% | 1% | 4% | 62% | N/A | 30% | N/A |
| VR Temple Beta | 2% | 1% | 1% | 4% | 67% | N/A | 25% | N/A |
| VR Spaceship Alpha | 2% | 1% | 1% | 4% | 62% | N/A | 30% | N/A |
| VR Spaceship Beta | 2% | 1% | 1% | 5% | 61% | N/A | 30% | N/A |
| Jungle Area North | 2% | 1% | 1% | 5% | 66% | N/A | 25% | N/A |
| Jungle Area East | 2% | 1% | 1% | 5% | 61% | N/A | 30% | N/A |
| Mountain Area | 2% | 1% | 1% | 6% | 65% | N/A | 25% | N/A |
| Seaside Area Central Control Area |
2% | 1% | 1% | 6% | 60% | N/A | 30% | N/A |
| Seabed Upper Levels | 2% | 1% | 1% | 6% | 60% | N/A | 30% | N/A |
| Seabed Lower Levels Control Tower |
2% | 1% | 1% | 6% | 65% | N/A | 25% | N/A |
Location / Hunting
The following quests are recommended for hunting item boxes on certain areas. For a general efficient item box hunt refer to the box run guide.
Episode 1
Forest 1
- [Side Story]
 Native Research: Ignore Enemies (45)
 - [Side Story] Forest of Sorrow (51)
- [Side Story] The Fake in Yellow (49)
Forest 2
- [Extermination] Sweep-up Operation #1 (36)
- [VR] Tyrell's Ego (??)
Cave 1
- [Side Story] Addicting Food (60)
- [Side Story] Secret Delivery (56)
- [Side Story] The Grave's Butler (56)
Cave 2
- [Government] 2-3:The Mutation (50)
Cave 3
- [Extermination] Sweep-up Operation #2 (33+2 Set)
Mine 1
- [Extermination] Mop-up Operation #3 One Room (9), Clear Quest (54)
- [Government] 3-3:Central Control (60)
- [Side Story] Knowing One's Heart (56)
Mine 2
- [Government] 4-1:The Lost Ruins (69)
- [Side Story] Dr. Osto's Research (50)
- [Extermination] Sweep-up Operation #3 (31+1 Set)
Ruins 1
- [Side Story] Seek my Master (68)
- [Retrieval] Road To Nowhere: Ruins 1 (41)
- [Retrieval] This Must Be The Place: Ruins 1 (41)
Ruins 2
- [Government] 4-2:Buried Relics (56)
- [Extermination] Sweep-up Operation #4 (33+4 Set)
Ruins 3
- [Government] 4-4:The Tomb Stirs (49)
- [Side Story] The Retired Hunter (34)
Episode 2
VR Temple Alpha
- [Side Story] Seat of the Heart (22)
- [Government] 5-5:Test/VR Temple 5 (42)
- [Extermination] Sweep-up Operation #5 (19+4 Set)
VR Temple Beta
- [Government] 5-2:Test/VR Temple 2 (40)
- [Side Story] Seat of the Heart (24)
VR Spaceship Alpha
- [Government] 6-1:Test/Spaceship 1: Clear first room (9) / Clear Alpha (38+3 Set)
- [Extermination] Penumbral Surge #2: NE, SW + SE Warps, 1st rooms (12) / Clear Alpha (36)
- [Government] 6-5:Test/Spaceship 5 (38+2 Set)
- [Extermination] Sweep-up Operation #6 (28+6 Set)
VR Spaceship Beta
- [Government] 6-4:Test/Spaceship 4 (50) *Starts Alpha
- [Government] 6-5:Test/Spaceship 5 (42) *Starts Alpha
Jungle Area North
- [Government] 7-5:Isle of Mutants: First 3 Rooms (16+4 Set)
- [Government] 7-1:From the Past: First 4 Rooms (15)
- [Retrieval] Lost FILL CANNON: Start (4) / First 6 Rooms (18+5 Set)
- [Extermination] Sweep-up Operation #7 (15+2 Set)
Jungle Area East
- [Tower] Twilight Sanctuary: enter alcoves in second room (9) / Clear Jungle (34+2 Set)
- [Government] 7-2:Seeking Clues: 1st Warp (9)
Mountain Area
- [Extermination] Phantasmal World #2: First 3 Rooms (14)
- [Government] 7-3:Silent Beach: First 4 Rooms (14)
Seaside Area & Central Control Area
Seaside and Central Control Area share the same item box drops.
- [Extermination] Phantasmal World #1 (24)
Seabed Upper Levels
- [Extermination] Phantasmal World #3: Turn left, go forward until warp (44)
Seabed Lower Levels & Control Tower
Seabed Lower Levels and Control Tower share the same item box drops.
- [Government] 8-3:Purple Lamplight (34+8 Set)
- [Extermination] Sweep-up Operation #9 (18)
- [Extermination] Phantasmal World #4 (8)
Episode 4
Crater
All four Crater Routes and Interior share the same item box drops.
- [Free Roam] Crater North: Map with 2 Bridges at the beginning (190)
- [Extermination] Sweep-up Operation #10 (80)
- [Government] 9-5:The Chosen (1/2) (29)
Subterranean Desert
- [Extermination] War of Limits #4: First Warp (39) / Clear Quest (94)
- [Extermination] Sweep-up Operation #12 (61+7 Set)
- [Extermination] Sweep-up Operation #14 (44)
- [Free Roam] Subterranean Desert 1 (37/48/56)
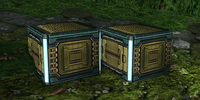
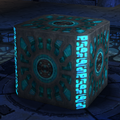
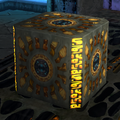
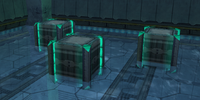
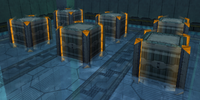
Gallery
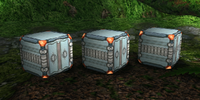
Forest boxes (Type 1)
Forest boxes (Type 2)
Ruins boxes (Type 1)
Ruins boxes (Type 2)
Seabed boxes (Type 1)
Seabed boxes (Type 2)
Desert boxes (Type 1)

Desert boxes (Type 2)


| Items | ||
|---|---|---|
Weapons |
Melee | Sabers • Swords • Daggers • Partisans • Slicers • Double Sabers • Claws • Katanas • Twin Swords • Fists |
| Ranged | Handguns • Rifles • Mechguns • Shots • Launchers | |
| Technique | Canes • Rods • Wands • Cards | |
| Other | ES weapons • TypeM weapons | |
| Frames • Barriers • Units • Mags | ||
| Item box • Meseta • Technique disks • Tools • Traps | ||