Game mechanics
Compilation of formulas and other mechanics.
Attacking
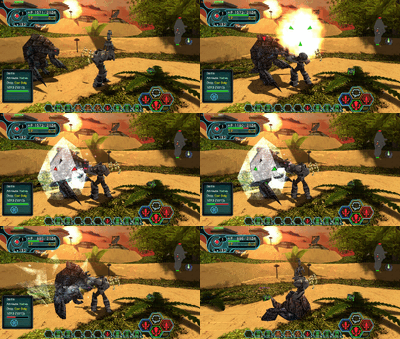
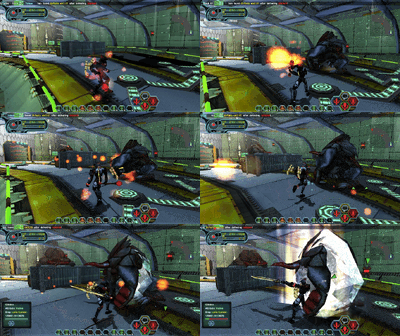
Attacks are the most basic ways to damage a monster in PSO, and there are three distinct types: Normal, Heavy, and Special. With proper timing, characters wielding the majority of weapons in the game are able to perform three attacks in a row, known as a "combo," and a combo may be comprised of any combination of these attack types (e.g. Normal, Normal, Normal; Normal, Normal, Heavy; Heavy, Special, Normal; etc.)
Almost any weapon can attack in a three-hit timed combo; for weapons that cannot, see the list of weapons which cannot combo. The first attack of a combo has no accuracy modifier, the second has a 1.3x accuracy modifier, and the third has a 1.69x accuracy modifier, see Accuracy for more detail.
Killing a target in a single combo is described as a Combo Kill.
Normal attacks
Normal attacks are the most basic of three attacks. They deal the least amount of damage, but have the highest accuracy. Monsters struck by normal attacks will receive damage, as well as flinch (with some exceptions).
Heavy attacks
Heavy attacks are a basic attack with increased damage in exchange for decreased accuracy. Monsters struck by heavy attacks will receive damage, as well as be pushed back slightly (with some exceptions, e.g. Poison Lilies, which are rooted to the ground).
Special attacks
Special attacks utilize the equipped weapon's special attack (if it has one), which have varying effects, but have lower accuracy than heavy attacks. Monsters struck by special attacks will be subject to the weapon's special attack properties, but will not be pushed back. Special attacks also do not contribute to the Photon Blast gauge.
Notable exceptions
The following weapons ignore the above properties, and have special attacks that retain certain properties of heavy attacks (but still have additional properties):
 Dark Flow (at under 12.5% maximum HP, launches five projectiles at differing angles, each of which have heavy attack power and accuracy)
 Vjaya (costs
  10,000 Meseta per use, deals greater damage than other sacrificial special attacks, but retains heavy attack accuracy)
 Dark Meteor (fires a piercing green wave projectile that lingers, passes through walls, and retains heavy attack accuracy)
 Frozen Shooter (fires a projectile that is guaranteed to inflict the
  Freeze status if it lands, but retains heavy attack power and accuracy)
 Snow Queen (exactly like Frozen Shooter above, but with the added capacity to "pierce" enemies, meaning the projectile continues traveling to hit other targets beyond the first one struck)
A sacrificial special attack – Charge, Spirit, or Berserk – deals 3.33x more damage. ![]() Vjaya's special attack deals 5.67x more damage.
Vjaya's special attack deals 5.67x more damage.
HP drain, TP drain, EXP steal, Freezing, Paralysis and Confusion weapon special attacks deal 0.67x damage. Additionally, HP drain attacks deal damage equal to the HP drained from the enemy.
![]() Orotiagito's piercing wave special attack deals 1.94x more damage, and
Orotiagito's piercing wave special attack deals 1.94x more damage, and ![]() Raikiri's similar special attack deals 0.97x damage.
Raikiri's similar special attack deals 0.97x damage.
Physical damage
To calculate physical damage (i.e. any damage not resulting from a fire/electric special attack or a Technique):
1. Begin by calculating the equipment ATP, EQATP:
EQATP = [WATP,min + (Grind * 2) + FATP + BaATP] x [Watr + 1]
- WATP,min = Minimum possible weapon ATP
- FATP = Frame ATP
- BaATP = Barrier ATP
- Watr = Weapon attribute %
2. Next, calculate the BaseATP:
BaseATP = BaseATP,max - Pvar,max
- BaseATP,max = ATP value displayed ingame in the Menu in brackets (see here for stat tables)
- Pvar,max = Maximum profession variance, which is
- Note: PSO always displays the maximum ATP values in the menu. In reality, each class has a hidden "base ATP value," to which a random, profession-specific ATP value is added. This base ATP value is of importance for ATP increases through
 Shifta, as seen in step 3 (more detail on Base ATP here).
3. Next, determine your effective ATP by applying the ![]() Shifta bonus SA to BaseATP and adding EQATP and Pvar:
Shifta bonus SA to BaseATP and adding EQATP and Pvar:
ATPeff = [BaseATP + (Wvar * WSpread)] * (1 + SA) + EQATP + Pvar
- SA =
 Shifta base power in %
 - Wvar = A random decimal between 0 and 1 for the weapon ATP variance per attack.
- Wspread = Weapon spread (e.g. a weapon with 300-400 ATP has a spread of 100 ATP)
- Pvar = Profession variance, a random value between:
4. Next, determine the effective target DFP:
DFPeff = DFPbase * (1 - ZL)
- DFPbase = Target base DFP
- ZL =
 Zalure base power in %
5. Finally, to calculate your damage on an enemy:
Damage = [(ATPeff - DFPeff) / 5] x 0.9 x Attack modifier
- Attack modifier is:
- Normal: 1
- Heavy: 1.89
- Special: 0.56
- Sacrificial: 3.33
 Vjaya: 5.67
5a. If the attack is a critical hit, calculate critical damage:
Critical damage = Damage x 1.5
The chance for an attack to be a critical hit is calculated differently for players and monsters, and use the following formulas:
- For players:
Critical hit rate = [min(LCK, 100) / 5]% - For monsters:
Critical hit rate = [min(LCK, 100) / 2]%
Other notes
The game doesn't round up damage values and instead truncates them. E.g. if the final calculated damage is 100.92, the real damage output is 100.
The formulas above show that a weapon's attribute percentages are only applied to its minimum possible weapon ATP. E.g. if a weapon has 300-400 ATP and 100% in an attribute, the ATP is increased to 600-700 (not 600-800). The variable spread remains a fixed value.
Knockdown
Characters will be knocked down if a single attack does 25% or more of their max HP.
Accuracy
To calculate accuracy:
1. Begin by calculating total ATA:
ATAtotal = ATAbase + WATA + FATA + BaATA
- ATAbase = ATA value displayed ingame in the Menu in brackets (see here for stat tables)
- WATA = Weapon ATA including Hit
- FATA = Frame ATA
- BaATA = Barrier ATA
Note: ATAtotal is the ATA value shown ingame (not in brackets) in the menu and thus can be directly determined without the formula above.
2. Next, calculate effective ATA:
ATAeff = ATAtotal * (Attack Type modifier) * (Combo Step modifier)
- ATAtotal = Total ATA value shown ingame in the Menu (not in brackets)
- Attack Type modifier is:
- Normal: 1.0
- Heavy: 0.7
- Special: 0.5
- Combo Step modifier is:
- First attack: 1.0
- Second attack: 1.3
- Third attack: 1.69
3. Next, calculate the enemy's effective EVP:
EVPeff = EVPbase * (Status Effect modifier)
- EVPbase = Target base EVP
- Status effect modifier is:
4. Finally, calculate accuracy using the appropriate melee or ranged accuracy formula:
Accuracymelee = ATAeff - (EVPeff * 0.2)
Accuracyranged = ATAeff - (EVPeff * 0.2) - (Distance Penalty)
- The calculated numbers are percentages. For accuracy values above
100, the given attack hits 100%. For negative values, the attack always misses (0%). - Distance Penalty is
Distance * 0.33if the character is a Hunter or Force without Smartlink (see Smartlink page for more detail), and 0 otherwise.
The accuracy check does not occur for certain projectiles if the target has moved too far when the projectile reaches the target's hitbox. This distance is 8 units for bullets. If the target has moved towards the player when manual evasion occurs, the "MISS" text is displayed. Certain weapons create attacks with launcher projectiles that do not have a manual evasion check.
Slicer projectiles follow different rules for collision. The projectile must come within 10 units of its intended target's original position for any collision check to occur. When this condition is met, the projectile connects with the target if the distance between the target's hitbox and the slicer's original position is less than the weapon's max distance. Due to consideration of the target's hitbox, slicers rarely experience manual evasion on most enemies.
Projectiles that are both subject to manual evasion and specifically fired at a target will have a lifetime calculated by (Distance to Target) / Speed. It is possible for the game to destroy the projectile before it physically collides with the target's hitbox if the target was pushed back. There will be no "MISS" text in this case. This is commonly seen when using Heavy Attacks with weapons such as ![]() L&K38 Combat and
L&K38 Combat and ![]() Yasminkov 9000M at a distance.
Yasminkov 9000M at a distance.
Techniques
Attack Technique damage formula
[(MST + TBP)/5] x (1.0 + CB + WB + FB + MB) x (1 - RES)
- TBP: Technique Base Power
- CB: Class Boost
- WB: Weapon Boost
- FB: Frame Boost
- MB: Merge Boost
- RES: Enemy Resistance
Technique Base Power
- TLv = Technique level
| Technique | Base Power Formula | TP Cost Formula |
|---|---|---|
|
Lv. 1-15: |
[1.3 * (TLv - 1)] + 5
| |
|
Lv. 1-15: |
[0.37 x (TLv - 1)] + 20
| |
|
Lv. 1-15: |
[0.25 * (TLv - 1)] + 30
| |
|
Lv. 1-15: |
[1.2 * (TLv - 1)] + 4
| |
|
Lv. 1-15: |
[0.5 * (TLv - 1)] + 25
| |
|
Lv. 1-15: |
[0.2 * (TLv - 1)] + 35
| |
|
Lv. 1-15: |
[1.1 * (TLv - 1)] + 6
| |
|
Lv. 1-15: |
[0.6 * (TLv - 1)] + 25
| |
|
Lv. 1-15: |
[0.3 * (TLv - 1)] + 35
| |
|
Lv. 1-15: |
[1.1 * (TLv - 1)] + 45
| |
|
Lv. 1-15: |
[1.05 * (TLv - 1)] + 30
| |
|
Lv. 1-30: |
[1.2 * (TLv - 1)] + 15
| |
| - | [0.5 * (TLv - 1)] + 10
| |
| - | 20 | |
|
Lv. 1-30: |
[1.2 * (TLv - 1)] + 15
| |
|
Lv. 1-30: |
[(TLv - 1)] + 10
| |
|
Lv. 1-30: |
[(TLv - 1)] + 10
| |
|
Lv. 1-30: |
[0.5 * (TLv - 1)] + 10
| |
| - | 10 |
Resta
Power
Amount healed by ![]() Resta (including
Resta (including ![]() Leilla Photon Blast):
Leilla Photon Blast):
MST * 0.5 + TBP
Self-Resta
Certain techniques, notably ![]() Resta but also applicable to other recovery, support, and some attack Techniques, can be forced to cast prior to acquiring external targets. As a result, the heal from
Resta but also applicable to other recovery, support, and some attack Techniques, can be forced to cast prior to acquiring external targets. As a result, the heal from ![]() Resta only affects the player who casts it. This occurs when an applicable technique is cast on the first actionable frame after performing an attack, recovering from knockdown, recovering from hit stun, interacting with a switch, or performing a Lobby Action emote.
Resta only affects the player who casts it. This occurs when an applicable technique is cast on the first actionable frame after performing an attack, recovering from knockdown, recovering from hit stun, interacting with a switch, or performing a Lobby Action emote.
- Note: Self-Resta does not work after certain other actions, such as casting techniques.
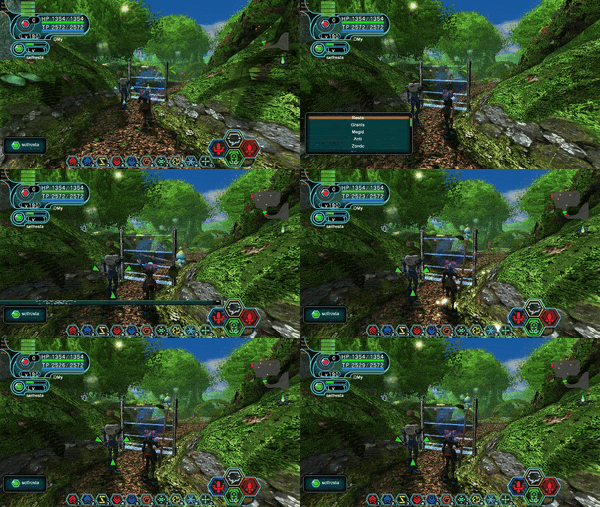
By utilizing the Techniques quick menu, self-Resta can be performed reliably. Techniques in the quick menu can be rearranged, allowing Resta to be placed at or near the top of the list. During the action, the quick menu can be opened and Resta can be selected and queued, buffering the cast for the first available frame (see graphic).
- Note: To access the Techniques quick menu, use "Action Palette Change" + "Symbol Chat Open" control bindings, followed by Right Bumper or Right Arrow Key to cycle from the Weapons (or Tools) quick menu to the Techniques quick menu. This menu can be rearranged using the "Details" control binding, typically the left face button on controller or Tab on keyboard.
Any Lobby Action can be performed while the Techniques menu or Techniques quick menu are opened, with Alt+F1 and Alt+F2 being common quick options for performing self-Resta. With this, the player only needs to press "Confirm" while the emote is playing to successfully execute this mechanic.
Self-Resta is primarily useful in parties with ![]() Dark Flow users, as Dark Flow's powerful special attack requires the user's HP to be below a certain threshold. Another use for self-Resta is to allow other players in the party to exploit set damage attacks for invulnerability
Dark Flow users, as Dark Flow's powerful special attack requires the user's HP to be below a certain threshold. Another use for self-Resta is to allow other players in the party to exploit set damage attacks for invulnerability ![]() Mag triggers by manipulating their own health precisely via
Mag triggers by manipulating their own health precisely via ![]() Monomates,
Monomates, ![]() Dimates,
Dimates, ![]() Trimates, and HP draining special attacks. Self-Resta allows players wishing to recover their health to do so without interfering with allies' strategies (or expending recovery items).
Trimates, and HP draining special attacks. Self-Resta allows players wishing to recover their health to do so without interfering with allies' strategies (or expending recovery items).
This mechanic can also be used with some Attack techniques but with minimal usefulness:
 Foie,
Foie,  Barta,
  Gibarta, and
  Megid will fire in a straight line from the player's facing direction and hit the first enemy in its path (Foie and non-piercing Megid) or many enemies in its path (Barta, Gibarta, and piercing Megid). Piercing Megid may see slightly improved effectiveness compared to if a standard targeted cast would instead collide with the floor and dissipate earlier than desired. Barta will not have the usual reduced speed and range when standing very near, inside, or directly below its target. The Technique will not be automatically aimed towards the closest target in the Technique's targeting cone.
 Zonde,
  Gizonde,
  Rafoie, and
  Grants will fail to produce any offensive effect, as they require a target to do so.
 Gifoie,
  Rabarta, and
  Razonde will perform normally, as they do not require a target for standard usage.
Special attacks
- Main article: Special attacks
(See also: List of weapons with reduced specials)
HP drain
Some rare weapons have special attacks that drain a set percentage of the character's max HP. These attacks can be used to manipulate a character's HP to precise values in order to activate Mag triggers (e.g. for invincibility) from set damage attacks, especially when paired with strategic usage of ![]() Monomates and
Monomates and ![]() Dimates for immediate 200 and 500 HP recovery (respectively) in Ultimate difficulty. These attacks are also useful on android characters to intentionally consume a
Dimates for immediate 200 and 500 HP recovery (respectively) in Ultimate difficulty. These attacks are also useful on android characters to intentionally consume a ![]() Scape Doll by dying, which will refill the character's
Scape Doll by dying, which will refill the character's ![]() traps.
traps.
Notably, ![]() Gal Wind's special attack, when used as the third attack in a combo, has the unique potential to activate a Mag's invulnerability trigger without requiring a target, as it drains 7% max HP per projectile, for a total of 21% of max HP drained at once.
Gal Wind's special attack, when used as the third attack in a combo, has the unique potential to activate a Mag's invulnerability trigger without requiring a target, as it drains 7% max HP per projectile, for a total of 21% of max HP drained at once.
| Weapon | HP drained |
|---|---|
| 5% | |
| 10% | |
| 5% | |
| 5% | |
| 5% | |
| 7% | |
| 7% | |
| 7% | |
| 7% | |
| 21% | |
| TP cost of Technique |
Trap shooting
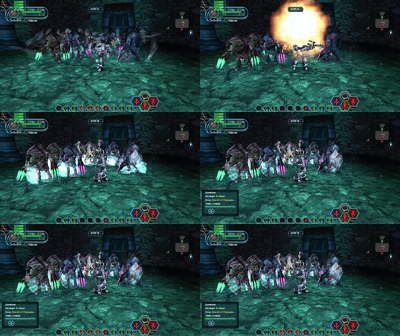
![]() Trap shooting is a technique that allows a set trap to be detonated almost instantly, making immediate use of its area-of-effect. This powerful tool is exclusive to Androids, making them the best classes for crowd control. Trap shooting is typically performed by setting a trap and immediately using a
Trap shooting is a technique that allows a set trap to be detonated almost instantly, making immediate use of its area-of-effect. This powerful tool is exclusive to Androids, making them the best classes for crowd control. Trap shooting is typically performed by setting a trap and immediately using a ![]() Normal attack with a Handgun to trigger it.
Normal attack with a Handgun to trigger it.
It can also be executed with other projectile-based weapons like Rifles, Mechguns, or Shots, provided the projectile velocity is high enough to reach and target the trap. Equipment that increases attack speed makes trap shooting slightly easier.
A player’s height also affects the timing window for shooting the trap. Taller characters have a more forgiving timeframe to execute the trap shot, giving male Android classes an advantage over their shorter female counterparts. During character creation, setting height to the maximum can make trap shooting easier.
A unique characteristic of trap shooting is that the player always faces south on the minimap when performing it. This can be strategically exploited by continuing the attack combo into combo step 2 and 3 after triggering the trap, attacking enemies south from the player.
Traps can also be instantly detonated by other party members using ![]() Lieutenant Mantle's
Lieutenant Mantle's ![]() Trap Vision effect, which allows them to see and target traps set by Android allies. This method is often used by Forces who continuously cast
Trap Vision effect, which allows them to see and target traps set by Android allies. This method is often used by Forces who continuously cast ![]() Gifoie. The wide area-of-effect of Gifoie ensures any trap within its range detonates immediately, enabling instant crowd control.
Gifoie. The wide area-of-effect of Gifoie ensures any trap within its range detonates immediately, enabling instant crowd control.
A more precise method, offering greater control for Androids, is utilizing ![]() Twin Blaze's
Twin Blaze's ![]() Gifoie special. The low-level Gifoie cast by Twin Blaze lingers near the user, allowing for immediate trap detonation. With an understanding of enemy spawn patterns, Gifoie can be prepared in advance. When enemies appear, a trap can be set and detonated instantly, providing immediate crowd control and creating an attack window.
Gifoie special. The low-level Gifoie cast by Twin Blaze lingers near the user, allowing for immediate trap detonation. With an understanding of enemy spawn patterns, Gifoie can be prepared in advance. When enemies appear, a trap can be set and detonated instantly, providing immediate crowd control and creating an attack window.
Frame data
- Phantasy Star Online Blue Burst runs at 30 frames per second ("FPS")
- See Game mechanics/Frame data for individual weapon/technique frame data


